,


Pork or Pork and Beef Meatballs, Roasted


Pork Meatballs with Fresh Peach Salsa
These meatballs go with a topping such as a tomato sauce, fruit salsa or chutney, or barbecue or sweet-sour sauce. The meatballs can be made ahead then reheated briefly in the oven or over a grill. 

The recipe serves 4-6 persons as a main course or snack.


1 pound ground pork or a pork and beef mixture

1 very small clove garlic, finely minced

1 teaspoon salt

1/2 cup bread crumbs

1 egg

2 tablespoons water

2 teaspoons tomato ketchup

1/4 teaspoon oregano

1/4 teaspoon ground black pepper

A pinch of ground nutmeg

A pinch of cayenne


Mix all the ingredients together well, then knead the mixture with your hands until completely smooth. 

Heat oven to 350 degrees. 

Lightly oil a baking pan or cookie sheet, or spray it with baker’s spray, Roll the meat into 1-1/4 inch meatballs (easiest if using a small scoop to portion out the meat mixture first). A little water on your hands makes the meatball rolling easier. Place meatballs on the baking sheet with some space between them. 

Bake the meatballs 6 minutes. Then with a sharp spatula turn the meatballs and roast another 6 minutes. Turn the meatballs again and bake for another 6 minutes, or until cooked through.
 

Serve on a platter with a sauce or salsa drizzled over them.

,


Fresh Peach Salsa


Working with a young colleague who produces short videos on cooking, I prepared for the upcoming filming in mid-summer in Athens Georgia – read peak peach season -- by developing a fresh peach salsa. We will use it for the video over pan-seared chicken thigh. But if I could get good salmon right now we’d serve the peach salsa over grilled salmon. 

This fresh peach condiment is a different, and fairly easy, use for our major Georgia fruit, and a change from the typical fruit snack and desserts that are all about. 

Use the salsa over grilled meat, chicken or fish, or over cheese such as goat cheese or Brie, or just scoop it up with tortilla chips. 

The recipe makes sufficient salsa for 4-6 people. But the recipe is easily doubled. The salsa will keep in the refrigerator for up to a week.


1 medium-large peach

1 small green onion, green part only

1-inch length piece of jalapeño pepper, membrane and seeds removed

1/8-inch slice of fresh ginger, peeled

2 sprigs cilantro or 3 mint leaves

1/2 teaspoon salt, plus more to taste

3 teaspoons brown sugar

5 teaspoons freshly squeezed lime juice


Peel peach and remove the pit. On a cutting board, using a chef’s knife, slice then finely mince the peach flesh. Transfer to a bowl. On the same cutting board, very finely mince the green part of the onion, the jalapeno, the ginger and the fresh herb leaves. Add the mixture to the minced peaches. Stir in the salt, sugar and lime juice. 

Let the salsa rest for 10-15 minutes, Stir well and taste. If needed, add a little salt, sugar or lime juice to taste. Store, refrigerated, for an hour or more
before serving to let the flavors mingle.

,


Pork braised with Fresh Summer Peppers


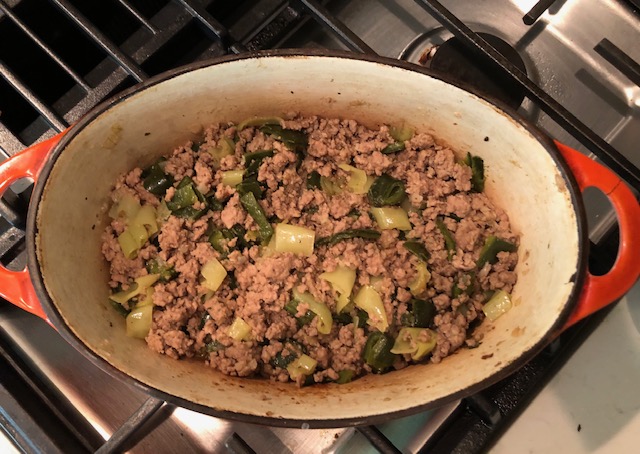
Having picked up some beautiful freshly ground pork at the Dekalb Farmers Market this morning, I braised it with mild seasonings and two kinds of locally grown sweet peppers, Banana peppers from my son-in-law Jason’s garden and a Poblano from the Farmers Market. The tender, savory dish made a delightful hot-weather dinner accompanied by Italian rustic bread, fresh corn on the cob and a cucumber salad. Best of all, the dish was easy to make, also suitable for summer. 

Here’s my recipe. It will serve 4-6 people.


1 pound freshly ground pork, fairly lean

1 medium-small onion, diced

1 large clove garlic, minced

3/4 pound of a mixture of sweet banana peppers and 1-2 Poblano peppers  

3/4 teaspoon freshly ground black pepper

3/4 teaspoon paprika

1/4 teaspoon dry oregano

1 teaspoon sea salt, plus more to taste

3 tablespoons white wine


In a heavy pot, gently fry together the pork, onion and garlic, stirring frequently until pork turns color but does not start to brown,

Meanwhile, cut peppers in half and remove stems, cores, seeds and membranes. Cut peppers into 3/4-inch pieces.

When pork has lost its raw color, add spices, salt and wine. Simmer, covered but stirring occasionally, until pork is tender, 10-12 minutes. Add a tiny bit of water if becoming dry, 

Add peppers and simmer, covered, stirring occasionally until peppers just become tender,. Do not overcook them. Taste, and add a little salt if needed,

Serve with crusty bread or a rice dish, plus a simple salad.

,


Caesar Salad, with or without Anchovies 

Named for Caesar and by Caesar at a place run by Caesar, the assertive Caesar Salad, composed of romaine lettuce and herbed croutons tossed with a rich anchovy aioli and sprinkled with shredded Parmesan, is a particular favorite in my family. But this classic is hardly from Ancient Rome. It was developed in the mid-1920s in … (wait for it) … Mexico. 

Julius Caesar, the conquering Roman general who fought the Gallic Wars, subdued the Celtic Gauls, invaded Britain, and built a bridge over the Rhine River, subsequently returned to Rome and overthrew the Republic. He established what became the Roman Empire, with himself as “Dictator.” The title “Caesar” was assumed for centuries by the emperors who succeeded Caesar. By extension the name indicated the leadership of the Empire itself. (The Synoptic Gospels attribute to Jesus the skillfully pragmatic injunction, “Render unto Caesar the things that are Caesar’s and unto God the things that are God’s.”) 

Long after the fall of Rome, the term “Caesar,” its spelling suitably transcribed, continued as a title of imperial leaders, from the “Kaisers” of Prussia to the “Tsars” of Russia. “Caesar” also became a popular, if aspirational, boy’s name, especially in Italy and Spain. And therein lies the connection between Julius Caesar and the conquering, classical salad that bears his name. 

Chef and restaurateur Caesar Cardini, an Italian immigrant to Southern California, who clearly liked his name, created the hearty salad at his restaurant, Hotel Caesar in Tijuana, Mexico, and named the dish after himself. A few minutes’ drive across the Mexican border from San Diego, Caesar’s place in Tijuana was particularly popular with Californians in the 1920s, since there they could dodge the rigors of Prohibition. Caesar Salad became established first in Southern California, then in the country as a whole. 

The salad has been through some modifications, and the dressing is generally no longer made fresh by hand aside the customer’s table. But the dressing’s common features still include mashed anchovy, garlic, olive oil, lemon juice, Dijon mustard and egg yolk. The salad ingredients are romaine lettuce, shavings of Parmigiano cheese, and toasted croutons. 

Here is my version of Caesar Salad, with a simplified dressing that uses the egg already incorporated in mayonnaise rather than raw, or coddled, egg yolk. 

The recipe serves six to eight, but extra dressing keeps for a few days refrigerated (and can also be used as a dip). Make the dressing before making the salad. 

Dressing:

1 cup “real” mayonnaise (such as Duke’s or Hellmann’s)

2 teaspoons anchovy paste (use an extra teaspoon if desired, but reduce the salt in the recipe)

1 medium-large clove garlic, put through a press or extremely finely minced

2 tablespoons freshly squeezed lemon juice

1 teaspoon Dijon mustard

1/4 teaspoon salt (1/8 teaspoon if using the third teaspoon of anchovy paste)

1/4 cup extra virgin olive oil 

Place all ingredients except olive oil in a medium-sized bowl. Whisk everything together. While continuing to whisk, slowly drizzle in the olive oil until all is incorporated. Taste (the garlic will seem peppery for a few minutes) and add salt and/or lemon juice if needed. 

Salad:

2 medium heads romaine lettuce

1/8 pound of solid Parmigiano/Parmesan cheese

1 cup seasoned croutons 

Cut lettuce into roughly 1-1/2 inch squares, rinse them in a colander then shake to drain. Transfer to a large salad bowl. Using a vegetable peeler, shave thin strips of cheese into the bowl. 

Shortly before serving, toss lettuce and cheese shavings with sufficient dressing to moisten them well. Sprinkle with croutons and mix very briefly. Restaurants sometimes offer a few fresh grinds of black pepper as a topping.   

,
White Beans braised with Sage: Fagioli alla Salvia 

Our daughter, Maria, and her family will be living in southern Tuscany, in Cortona, for several months this fall while she teaches ceramics at the University of Georgia Study Abroad program in Italy.

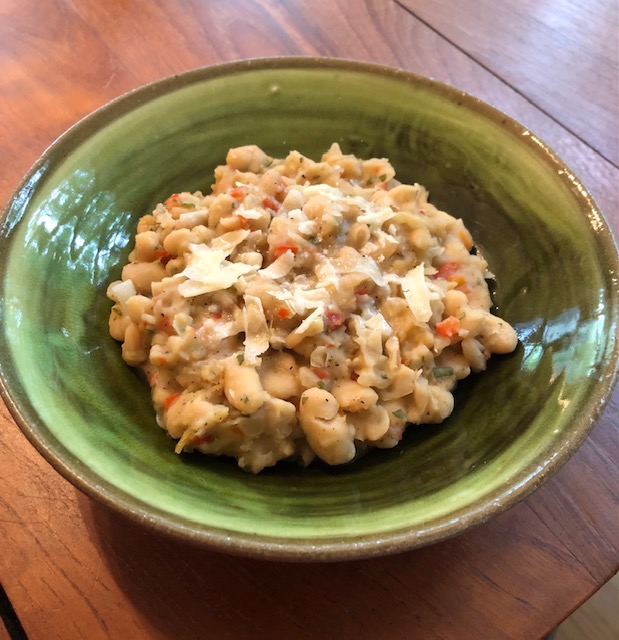
Preparing a dinner for her family a few weeks ago, I asked for ideas on the menu. Maria wanted a bean dish, something she greatly likes, and requested specifically it be seasoned with sage. Sage is particularly popular in Tuscan dishes. 

Here’s my effort at a Northern Italian-style white bean dish with sage, perhaps slightly fancifully Tuscan. It was well received. 

The beans are cannellini, white kidney beans, which are especially popular in Italy and the Mediterranean. They are increasingly available in the US, including at local supermarkets, some of whom, like Kroger, even carry their own brand of them. 

The recipe serves six as a side dish or a topping for pasta. 


2 (14-ounce) cans cannellini beans (or Great Northern beans) 
1 small onion 
1/4 of a red bell pepper 
10 fresh sage leaves 
4 tablespoons extra virgin olive oil 
1/2 teaspoon salt, plus more to taste 
1/4 teaspoon ground black pepper 
1/8 teaspoon cayenne 
3/4 cup chicken broth 
3 tablespoons grated Parmesan or Romano cheese  for topping

Drain the beans and rinse them briefly. Set aside. Mince the onion and the bell pepper. Separately, finely mince the sage leaves. 

Beans withpasta -- Pasta e Fagioli
In a heavy pan, gently fry the minced onion and bell pepper in the olive oil, stirring frequently, until the vegetables are softened but not browned. Add the drained beans, seasonings and the chicken broth. Stirring frequently, simmer the mixture together 4-5 minutes. Remove from the heat. 

Taste and add a little salt if needed. 

Serve hot as a side to dinner. Alternatively, serve over, or tossed with freshly cooked pasta. Sprinkle with grated cheese.


,


Brussels Sprouts Glazed with Balsamic Vinegar


While my wife and I are quarantined at our house with Covid infections, time has turned slow. Fortunately, both of our infections are mild, since we were fully vaccinated and boosted. But there have been several days of fever, cough, mild headaches and lots of sleep. Mostly it’s that our schedules are suddenly totally disrupted, plans tossed aside. We can’t see the kids or grandkids except waving out the door, and our appetites are down. 

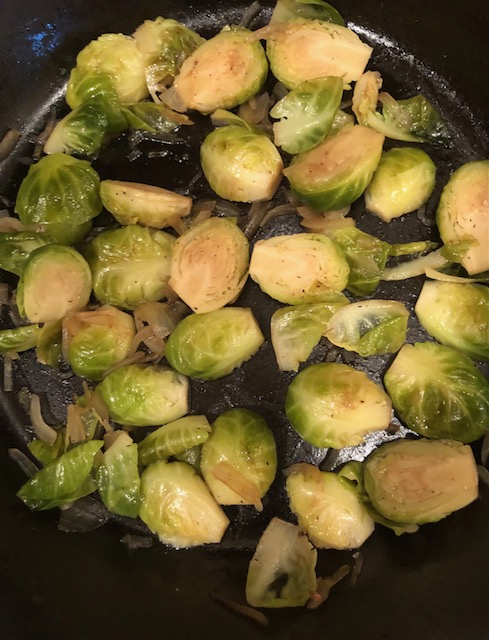
This is the first cooking I’ve done in four days. And it’s possible that my taste is slightly distorted. Having Brussels sprouts in the fridge, I braised some to go with reheated mac and cheese, itself left over from the cancelled (“postponed”) family Fourth of July dinner we were going to host.

Not exactly hot weather food, but since we’re stuck at our house for another seven days, I might as well use up what’s in the fridge. And no American regrets losing a few pounds as a rare benefit of the pandemic.

Here’s a quick way that I cook Brussels sprouts. A variant is to use a little sour cream at the end of braising rather than balsamic or wine vinegar. Sprouts have a little bitterness in them, which is offset or neutralized by the vinegar or the sour cream. 

The recipe serves four as a side dish. (Today I did a half recipe since no one can join us.)


1 pound (about 24-26 medium) Brussels sprouts

2 tablespoons finely shredded onion (optional)

3 tablespoons olive oil

1/2 teaspoon salt, plus more as needed

1/4 teaspoon grated black pepper

Water as needed

3 teaspoons balsamic vinegar di Modena (or 2 teaspoons red wine vinegar)


Trim the ends and any spoiled leaves off the sprouts. Cut the sprouts in half lengthwise. 

Place cut sprouts, onion if used, and olive oil in a wide frying pan. Sprinkle with the salt and pepper and stir and fry for about a minute until pale golden fried spots appear. Add several tablespoons of water, cover the pan, and fry on lowest heat, stirring occasionally. Add a little more water as needed so the bottom of the pan is wet and the sprouts get steamed as well as fried. 

When sprouts are nearly as tender as you prefer (test with a toothpick or eat one), add salt to taste plus the balsamic or red wine vinegar, and a tiny bit more water. Stir and fry another minute or so. Check for salt, and if needed add a little more. 

Serve warm.

,


Fried cheese is amazing

It seemed like a good idea at the time.

I’ve always wanted to start a story with that lead-in. But this time disaster didn’t ensue. The idea was frying cheese, and it succeeded. 

The reason I started was practical. I wanted to reproduce the fried cheese I ate at a long-gone Greek restaurant in Atlanta, back when those places were still owned by people from the Old Country. It was so I could include the dish in a cooking class on Mediterranean appetizers. It wasn’t merely fried cheese I had experienced years ago. It was a spectacle. Cooked at tableside, the golden-crusted slab in its little frying pan was then doused with Metaxa brandy. Then, the decidedly non-Greek young waiter held it aloft, set it aflame, and gushed, “Opa!” 

Despite the ersatz trappings, the cheese was wonderful. It lurked in my memory. That fried cheese, I learned later, is called “Saganaki” [sa-ga-NA-kee]. Despite sounding Japanese, the authentically Hellenic name derives from the shallow two-handled pan in which Greeks fry such dishes. Fried cheese is not usually flambéed in Greece. That bonus act of pseudo Greek drama is more a feature of North American Greek restaurants wanting to show off. 

Cheeses suitable for frying differ from melting cheeses. They soften but hold their shape. The classical Saganaki cheeses are Kefalograviera, Kefalotyri and Kasseri from Greece and Haloumi from Cyprus. Made from sheep’s milk or sheep’s milk mixed with goat milk, they are expensive but delicious. That’s the sort of cheese I employed in my cooking class. 

Subsequently, having started to fry slabs of cheese, I learned that it’s not just Greeks who do it. Some Latin American cooks also pan-fry cheese. 

So I tried Mexican and other Latin American style cheeses -- with success. The fresh cheeses (Quesos Fresco, Blanco, Panela and “de Frier”) work well – but not the “melting” types (Quesos Quesadilla, Asadero and Oaxaca). Being made from semi-skimmed cow’s milk and often from Wisconsin, they’re inexpensive, if not quite as tasty as the imported Mediterranean cheeses. 

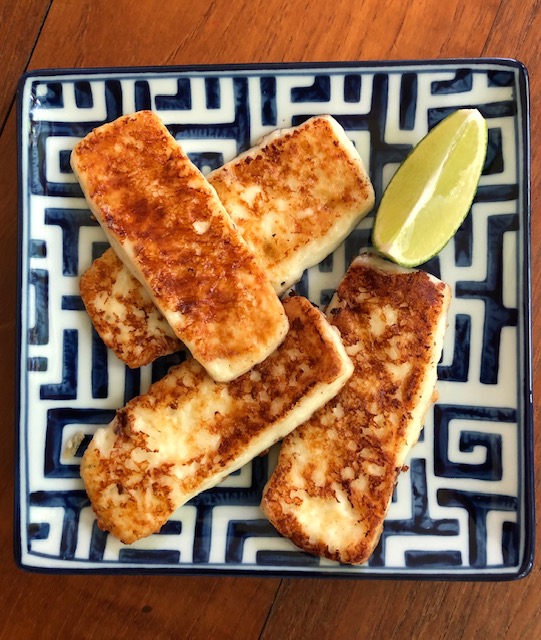
The keys to success with fried cheese are to get the lightly oiled pan medium hot (not smoking) before frying a few pieces at a time and using a thin spatula to slide under the frying cheese to separate its crust from the pan and keep it attached to the cheese. And before placing the cheese on the pan, dust the cheese pieces lightly on both sides with flour (or cornstarch, if avoiding gluten). 

The recipe serves six as a substantial snack or hors d’oeuvre. The setting is informal with diners near the stove so the cheese can be eaten quickly after it’s fried in small batches. For Greek cheeses, lemon juice is squeezed over it when serving; for Latin American cheeses use lime juice. A light dusting of freshly ground black pepper, while typical on Greek fried cheese, works to advantage on the Latin American version as well. 

If serving the cheese as snack, accompany it with crusty bread and a medium-bodied red wine with a little acidity, such as an Italian Sangiovese or Chianti, or a Pinot Noir or Beaujolais. 

Fried Cheese Appetizer (Queso Frito or Saganaki) 

1 pound of Mexican-style Queso Fresco, Queso Blanco or Queso Panela (or imported Kefalograviera, Kefalotyri, Kasseri or Haloumi)

2 to 3 tablespoons flour (or cornstarch) for dredging

Olive oil for frying

2-3 limes or lemons or limes, cut in wedges

Freshly ground black pepper, optional


Cut the cheese into 2-inch rectangular or triangle-shaped slices about 3/8 of an inch thick. 

Place flour or cornstarch on a small plate. Lightly dip both sides of cheese pieces into it and tap off the excess. 

Heat a heavy-bottomed frying pan (cast-iron works well), griddle or non-stick frying pan to medium heat. Add a little smear of oil. Sear a few cheese pieces at a time, not allowing them to touch. Using a thin-bladed metal spatula, turn them over when golden brown. They cook quickly. 

Remove cheese pieces to a plate. Squeeze on a little lime or lemon juice. If desired, grind a little black pepper on, as well. 

Enjoy the cheese hot. Accompany with crusty bread. 

Follow Us @donderoskitchen