,


Thai Soy Sauce Chicken – a Versatile Side Dish or Snack (with Gluten-Free Option)


I was introduced to this easily made chicken dish, Gai See Ew, by my sister-in-law, Nai, who is from Chaing Mai in northern Thailand. She prepared it as an add-on, a substantial condiment, for the savory garnished rice soup, “Khao Dom,” that she served for a crowd. The luscious morsels of seasoned chicken were placed in a serving bowl near many other small dishes – tiny pork meatballs, fried garlic, pickled cabbage, green onion and cilantro – offered buffet-style for guests to spoon onto their soup. Soy sauce chicken is home cooking rather than a restaurant dish.


I’ve made these treats as a topping or side dish for Thai food, and just for a snack aimed at my chicken-loving grand kids when they come to dinner. It goes well on top of an Asian noodle soup, like Ramen, or a garnished rice bowl. Thai soy chicken also makes a great (and easy) snack for a picnic-like gathering or appetizer buffet.


One batch of the recipe below will make nibbles or add-ons for six people. Since the chicken pieces are marinated then fried, if multiples of the recipe are used, the frying should be done in batches so that the chicken actually fries fairly dry rather than stews, which would happen if the chicken pieces were too crowded in the pan.


Typical soy sauce contains gluten, since some wheat is fermented in with the soybeans in its production. If gluten needs to be avoided, use a gluten-free Tamari-type of soy sauce. No other ingredient in the dish contains gluten.


1 pound boneless, skinless chicken breast

1 tablespoon soy sauce (see above if gluten must be avoided)

1 small clove garlic put through a garlic press or very finely minced

1/2 teaspoon cornstarch

1/2 teaspoon sugar

3/8 teaspoon salt

1/8 teaspoon ground black pepper

1/8 teaspoon cayenne

2-3 tablespoons vegetable) not olive) oil for frying

Several sprigs of cilantro for garnish, if desired


Trim off any tough or fatty parts of the chicken. Cut the chicken flesh into small pieces 1 1/2 inch by 1/2 inch by 1/2 inch in size. Mix well with the soy sauce, garlic, and dry ingredients. Allow to marinate, mixing occasionally, for at least an hour. Refrigerate if longer than that.


If making more than a single batch of chicken (1 pound), cook it in several lots of about one batch each so that the chicken pieces fry rather than stews.


Heat a large wok or frying pan to medium high. Add 2 tablespoons frying oil and when it’s hot add the chicken. Immediately begin stirring and frying the chicken pieces and scraping the bottom of the pan,  using a metal spatula or wok spatula. Cook this, stirring almost constantly, until no raw color remains and the surfaces start to turn golden, 5-7 minutes. Cut a piece of chicken in half to be sure the pink color is gone. Remove the chicken to a platter.


Serve warm as part of a meal, or at room temperature if using as an appetizer or part of a buffet.

,


Chicken Medallions with Fresh Herbs and Lemon – Chicken as a Side Dish


My grand kids, especially the boys, like chicken in small pieces, seasoned, which they can pile onto sandwiches, sprinkle on their pasta, or eat with rice. Here’s one I developed out of two Italian dishes I've enjoyed, in which seasoned chicken is sautéed and served nearly dry. The inspirations were both from Tuscany, pollo al limone (chicken with lemon) and pollo alle erbe (chicken sautéed with fresh herbs).


Because my grandsons, like many adolescents, do not like bits of green “stuff” in their food, I’ve kept the fresh herb sprigs intact during the marinating and roasting so they and fallen-off leaves can easily be removed for the benefit of young eaters.


The recipe is based on one pound of boneless, skinless chicken breast, but it can easily be increased depending on how many diners you have who eat chicken. Leftovers are useful.


For every pound of skinless, boneless chicken

5 sprigs of a mixture of various fresh herbs (rosemary, marjoram, oregano, sage, parsley, chives)

 (If only parsley available, add 1/4 teaspoon dry oregano)

1 small clove garlic put through a press or finely minced

1 tablespoon fresh lemon juice

1/2 teaspoon cornstarch

1/2 teaspoon salt

1 tablespoon olive oil

Fresh herb sprigs for garnish


Trim fat and any tough parts off the chicken. Cut into pieces 1 1/2 inches long by 1/2 inch by 1/2 inch.


In a bowl, combine the remainder of the ingredients, with sprigs of herbs intact. Mix well so that herbs start to macerate and soften. Stir in the chicken. Marinate for at least an hour, stirring frequently, so that the chicken gets exposed to a variety of herbs.


Set oven for 375 degrees. Spread chicken (and herbs) out on a large baking pan so there’s a little space between pieces.


Roast for 8 minutes. With a spatula, stir and turn the chicken pieces so they don’t stick together. Roast another 6 minutes, and stir again. The chicken should be cooked. Cut a larger piece in half to be sure the pink color is gone. If still pink in the middle, roast 3 more minutes. Let chicken cool. Pour off any juices. Discard the cooked herbs.


Place on a serving platter. Garnish with several sprigs of fresh herbs. Serve warm or at room temperature.

,

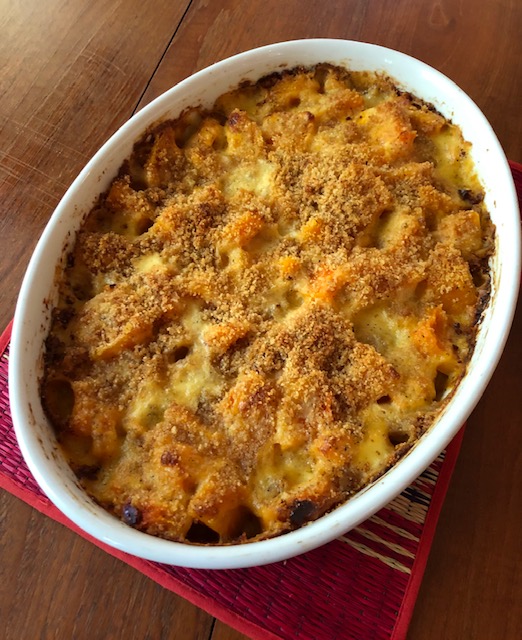
 Butternut, Pumpkin, or Kabocha Casserole – a French-Style Gratin


French cuisine, especially from the southeast of France, includes many wonderful and varied “au gratin” vegetable dishes. The common denominator seems to be baking with  cheese and/or oiled or buttered breadcrumbs.


This recipe is for a hearty, cold-weather gratin casserole of winter squash or the somewhat flat European-style pumpkin, French “courge” or Italian “zucca.” These are sometimes available here at farmer’s markets and called “heirloom” pumpkins. The Japanese “Kabocha squash” is fairly similar. In the US, the most readily available of these vegetables (though technically they are all “fruits”) is butternut squash. The dish can be the vegetable in a dinner, or a supper or lunch accompanied with warm baguette. The recipe serves six.


1 medium-large butternut squash or Kabocha (2 1/2 to 3 pounds)

3/4 teaspoon salt for vegetable plus 1/2 teaspoon for sauce

1 1/2 cups (loosely packed) coarsely grated Cheddar or Gruyère cheese

2 tablespoons grated Parmesan or Romano cheese

3 tablespoons butter

2 1/2 tablespoons flour

1 1/2 cups whole milk, or part cream

1/2 teaspoon ground black pepper

1/8 teaspoon grated nutmeg

A pinch of cayenne

4 tablespoons plain breadcrumbs moistened with 1 tablespoon olive oil or melted butter plus a sprinkle of salt


Cut off the stem and bottom ends of squash. Peel the squash. Cut it crosswise into 1/2-inch slices, scooping out the seeds with a spoon when you get to them. Cut the squash slices into 1-inch square pieces. Steam them over boiling water, stirring them once or twice, until tender (test with toothpick), about 15 minutes.


Cool the steamed vegetable, then transfer it into an attractive casserole dish. Sprinkle with about 3/4 teaspoon of salt, part at a time, and mix to season evenly. Top with the cheeses and mix them in gently.


Set the oven for 375 degrees.


Prepare béchamel sauce:  In heavy pan over medium heat melt butter with the flour. Cook mixture 2 minutes, stirring. With whisk, mix in milk or milk and cream and continue to whisk until the sauce comes to a boil. Let simmer, whisking frequently, until thickened,  2-3 minutes. Remove from heat and stir in 1/2 teaspoon salt, plus the pepper, nutmeg and cayenne.


Spoon sauce evenly over the vegetable in the dish and gently mix it in a little. Finish by sprinkling on the oiled or buttered breadcrumbs. With moistened paper towel, wipe off any sauce and vegetable stuck to the edges of the baking dish.


Bake in the middle of oven until the sauce is bubbling and the surface begins to brown, about 20-30 minutes. Serve hot. Or the baked dish can be cooled, refrigerated, and re-baked just long enough to he
,


Pasta with Smoked Salmon and Peas -- Easy


Smoked salmon is not common in Italy, while in Northern Europe, especially Scandinavia, it is extremely popular. But in Italy this special fish has one principal use: tossed in with pasta. Here is an attractive and super-easy pasta dish with smoked salmon and peas.


Like other pasta with seafood dishes, this one does not contain cheese. Cheese can be used in the antipasto, or strips of cheese, like Parmesan sliced off the block with a vegetable peeler, can be served on the salad.


The dish is made fresh and served hot. The recipe serves six. A salad is a nice accompaniment.


A hearty, chilled white wine, such as an un-oaked Chardonnay or a Viognier, or a somewhat cooled Pinot noir or Chianti (20 minutes in the refrigerator before serving) would be my pairing with this dish.


1 medium-large clove garlic

2 tablespoons olive oil

3/4 cup heavy cream

3/4 teaspoon salt, plus more if needed

1/2 teaspoon paprika

1/8 teaspoon black pepper

A pinch of cayenne

1 cup frozen peas

4 ounces smoked salmon, cold-smoked preferred

1/2 pound short pasta, such as penne or farfale (“bow ties”)

A little of the hot water from boiling the pasta, saved


Heat a large quantity of water for cooking the pasta. Keep it hot until time to cook the pasta.


Put garlic through a garlic press or mince it finely. Place in a large microwaveable bowl, from which the pasta will be served. Add olive oil, mix with the garlic, then microwave for 1 minute.


Add cream, salt and spices, and microwave 1 minute. Mix in frozen peas and hold until pasta is nearly cooked.


Cut salmon into 1/2-inch squares and keep ready for tossing with the pasta.


Add a teaspoon salt to the pasta water and boil the pasta, stirring constantly for the first 30 seconds so pasta does not stick together, then often during the cooking. After 7-8 minutes, depending on the pasta, cool then bite into a piece of pasta to test for tenderness. As soon as all crunch is gone from the pasta and it starts to become tender, drain it, saving a little of the cooking water in a cup.


Put the bowl with the cream and pea mixture back in the microwave and heat for 2 minutes, or until peas are hot. Stir, add the cut salmon and the drained, cooked pasta and toss well. If the sauce is dry, add a little of the hot pasta-cooking water. Taste, and if under-salted, add a little (the salmon may be salty, so be cautious).


Serve immediately.

,


Chicken Malai Curry


Chicken Malai Curry, or Murgh Malai, is a rich creamy dish of Mughlai ancestry from northern India. “Malai” is a type of clotted cream, often used in sweets. The sauce is lightly colored, and the chicken is in tender, boneless pieces. Potatoes can be added. As with many Mughlai dishes, the chili pepper “heat” is restrained compared with other Indian and Pakistani curries.


If regular heavy whipping cream is used, this is a surprisingly easy curry to make, though making curries is never really simple. The recipe serves 6 or more diners, but leftovers are great to serve another time. The flavors are best if the curry is made ahead then reheated (in microwave or stove top) for serving.


Serve the curry with unsalted white, particularly Basmati, rice. (A recipe for cooking Basmati, or Jasmine, rice can be found in the Index of this blog.)


2 medium-large onions, finely diced

3 cloves garlic, minced

1-inch piece fresh ginger, skin scraped off, ginger minced with the garlic

1 tablespoon ground coriander

3 teaspoons ground cumin

3 teaspoons turmeric

1 teaspoon cayenne

1 pound small yellow-skinned potatoes, not peeled but cut in quarters

2 pounds boneless, skinless chicken breast

1 teaspoon salt for the chicken plus 1 teaspoon for cooking

1/4 cup vegetable oil, such as sunflower or canola, not olive

1 1/2 cups water

3/4 cup heavy cream

Coarsely chopped cilantro for serving


Prepare the onions and place them in a heavy pot. Prepare the garlic with the ginger and set aside. Mix the dry spices in a small cup. Prepare the potatoes and store them in a bowl of water to prevent browning. Trim tough and fatty parts off the chicken and cut chicken flesh in 1-inch chunks. Mix 1 teaspoon salt into the chicken and set aside.


Add the oil to the onions in the pot and fry over medium-hot heat, stirring frequently and scraping the bottom of the pot. When the onion is well softened, and just beginning to turn golden (10-15 minutes), stir in the minced garlic-ginger mix for one minute. Reduce the heat and stir in the spices for another minute.


Add the water, increase the heat, and bring just to a boil. And add the potatoes. Simmer, stirring frequently, until potatoes are becoming tender when pierced with a toothpick. At that point stir in the remaining 1 teaspoon of salt. Add the cream and bring back to a boil.


Add the chicken and simmer, stirring frequently, for about 6-7 minutes. Add a little water if the sauce becomes dry. Test the chicken for doneness by cutting off a corner of a piece and checking that there is no pink color in it. Then bite into the piece of chicken to be sure it’s tender. Do not cook the chicken too long or it will become dry.


Turn off the heat. Taste the sauce for salt. Add a little if needed.


Although the curry can be eaten now, it improves in flavor and mellowness if cooled then refrigerated, and reheated later to serve. Taste the sauce again for salt and add a little if necessary. When serving, sprinkle the top with a little chopped cilantro. Accompany with white rice.


,


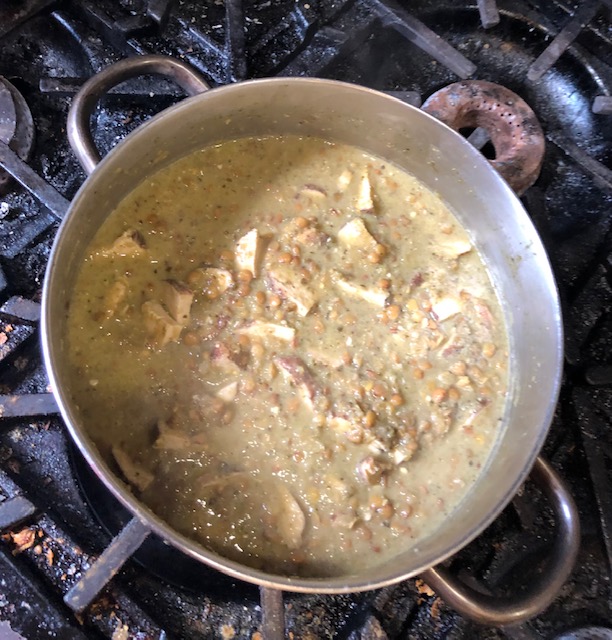
Pan-Seared Chicken in Green Chile with Lentils


In New Mexico, prepared green chile pepper mixture (fire-roasted Hatch chilies) is sold frozen in grocery stores. Here, we generally have to substitute, and do our own prep. Poblano peppers and tomatillos, as well as Jalapeño peppers, are always available where Mexican produce is sold, and often in supermarkets as well. The spices are available at both places.


Here’s an elegant and hearty main-course dish that includes lentils as well as chicken for the protein. The cooking involves several parts that all come together at the end.


The recipe serves six to eight generously. But leftovers are great to have for another day. Serve the chile in wide, shallow soup bowls. Accompany with warm corn tortillas or with rice, and offer sour cream and hot sauce on the side.


1 cup tan or green lentils


For the chicken:

2 pounds boneless, skinless chicken breast

3/4 teaspoon salt

1/2 teaspoon ground black pepper

1/2 teaspoon ground allspice

1/2 teaspoon ground cumin

1/2 teaspoon cayenne

1/4 teaspoon garlic salt

2 tablespoons olive oil


The pepper mixture:

2 large Poblanos

4 Jalapeños

1 large green bell pepper

4 medium tomatillos

1 large onion

6 cloves garlic


Finishing the chile:

2 1/2 cups chicken broth and/or water

1 1/2 teaspoons salt, plus more to taste

1/4 teaspoon ground black pepper

1/4 teaspoon ground cumin

1/4 teaspoon ground allspice

1/2 cup sour cream, plus extra sour cream for serving


Soak the lentils in a bowl with boiling water to cover them by 3 inches. Set aside while working on other parts of the dish. Drain them before cooking.


Trim chicken breast pieces of any tough parts and excess fat. Rub the chicken with a mixture of the salt and spices. Finally rub with the olive oil. Set aside to season while roasting the peppers.


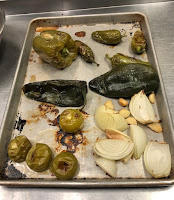
Set the oven for 375 degrees. Rinse off the three types of peppers and place them whole on a baking sheet. Discard husks from the tomatillos and add tomatillos to the baking sheet. Peel and quarter the onion and add it to the baking sheet. Peel the garlic cloves and add them whole. Roast in the oven 10 minutes. Turn the vegetables and roast another 10 minutes.  If the skins on the peppers are not blistering and browning, roast them another 5 to 10 minutes. Let them cool somewhat.


Peel charred skin from peppers (some can be left attached). Remove stems and seeds from peppers. Put all the roasted vegetables in food processor and chop them very well, but not to a puree. Set aside.


Heat a heavy cooking pot to medium high. Fry the seasoned and oiled chicken, turning the pieces every 3 minutes, for a total of 6 minutes on each side. Keep the pot for further use. Remove the chicken to cool on a board or plate. Slice it  into 1/4-inch pieces, then cut them crosswise into halves. Set aside.


In the pot used to fry the chicken, place the finely chopped pepper mixture plus the chicken broth and/or water and bring to a boil. Drain the lentils and add them. Simmer, stirring frequently and scraping the bottom of the pot, until lentils are becoming tender, 10-15 minutes depending on the lentils. Then add the salt, black pepper, cumin and allspice.


Continue simmering until lentils are tender, but still intact. Add the pre-cooked, cut chicken. Simmer till fully heated. Add a little water if the mixture is very thick. Stir in the sour cream and bring back just to a boil. Taste and add salt, if needed. Remove from the heat.


The chile can be served now, or cooled and reheated later. Serve accompanied by a rice dish or warm corn tortillas. Have a side bowl of sour cream that diners can add to their chile if desired, plus a bottle of hot sauce that can be added.

,


Cabbage Curry, an Easy Vegetarian Dish with a Vegan Option


I’ve been somewhat slow at getting one of my favorite types of food, Indian and Pakistani curries, onto the blog, even though I cook them frequently, and make a lot of them at the restaurant. The principal reason is that most curries have many steps and use a wide variety of spices that are not frequently in American household kitchens. But I now plan to start posting more recipes for some of my favorites. 


I get my spices in small bulk quantities at our Dekalb Farmers Market, but they’re available inexpensively also at Indian groceries. And actually many, though not all, of them are available cheaply at Mexican stores.


At any rate, here’s a fairly simple cabbage curry, a nice side dish for an Indian dinner. This curry uses fewer spices than the more complex meat curries and many of the vegetable curries. I’m showing the method for a western or north-western Indian way of making this, which contains dairy products. But I also mention an easy Vegan version, similar to that made in South Indian Tamil cooking, where coconut milk, rather than cow’s milk, is standard.


The recipe makes enough for a side dish for 6 to 8 persons.


1 small or half a large head cabbage (about 1 1/2 pounds)

1 small onion

3/4 inch fresh ginger

1 large clove garlic

1 teaspoon whole cumin seeds

1 1/2 teaspoons turmeric

1/2 teaspoon cayenne

3/8 teaspoon ground coriander

4 tablespoons canola, sunflower or vegetable oil

1 teaspoon salt, plus more to taste

3/4 cup whole-milk yogurt (or canned unsweetened coconut milk plus 1 teaspoon lime or lemon juice as a Vegan substitute)

1/2 cup water, plus more as needed

Coarsely chopped cilantro for garnish


Prepare vegetables and spices before starting to cook. Quarter and core cabbage. Cut quarters in half lengthwise, then slice across into 1/4-inch shreds. Dice onion. Peel the ginger by scraping the peel off with the edge of a teaspoon. Mince garlic and ginger together with chef’s knife on the cutting board. Have oil and whole cumin ready. Combine ground spices in a small bowl. Have the yogurt (or the coconut milk) ready.


Heat heavy pot to medium hot. Add oil, and when it’s hot add the cumin seeds and let them splutter 10 seconds, stirring. Add the onion, and stir it together well with the cumin seeds. Stir and fry the onion till well softened and beginning to turn pale golden in areas. Stir in the ginger-garlic mixture and stir and fry for a minute. Lower the heat and add the dry spice mixture. Stir and it fry with the onions for one minute.


Add the yogurt (or the coconut milk plus lime or lemon juice) and stir and let the mixture come to a boil. Add the water and bring back to a boil. Add the salt and the cabbage, and stir, scraping the bottom as this mixture heats and begins to bubble gently.


Cover the pot and let the mixture simmer, stirring occasionally. Add a little water if necessary so the sauce does not dry out. Total cooking time for the cabbage will be 15-20 minutes, or until tender. Taste for salt, as well as for tenderness, and add a little salt if necessary.


The curry can be served now, or preferably cooled and stored for a while to let the flavors mingle. Reheat to serve.


Serve sprinkled with coarsely chopped cilantro.


,


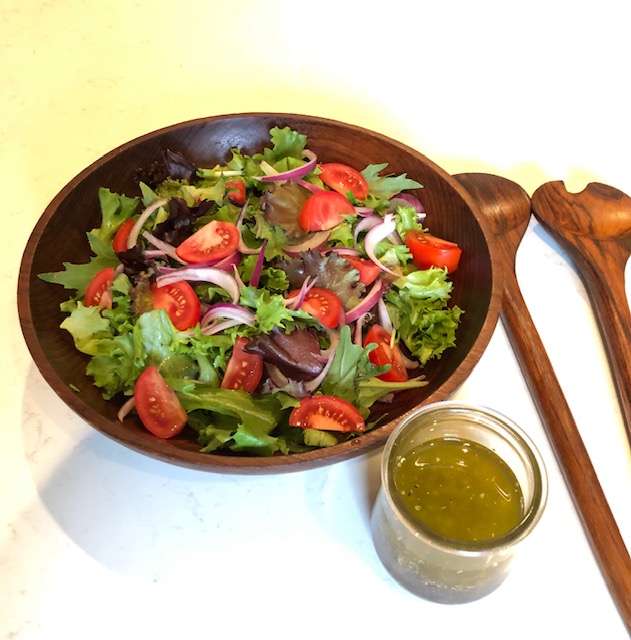
Salad Dressing: Garlic-Herb (“Italian”) Dressing


I’ve recently posted a number of salad dressings, “vinaigrettes,” on this blog. They can be found in the index. Homemade salad dressings, to me, are always fresher and tastier, and certainly cheaper, than store-bought bottled ones. Most are easy and quick to make.


Here’s one that is closest to what my mother used to make, and is close to the one we make most at our restaurant. It is easy. I use only part olive oil, in this case half and half with sunflower (my other favorite oil) or canola oil.


The dressing will keep a number of days in the refrigerator. In addition to salads, it can be drizzled over avocado. It can also be used to marinate chicken breast or fish for the grill.


The recipe makes enough dressing to dress salad for 6 to 8 people.


1 large clove garlic partly crushed but still intact

2 tablespoons water 

2 teaspoons sugar

1-1/4 teaspoon sea salt or table salt

1/2 teaspoon dry oregano

2 tablespoons olive oil

2 tablespoons sunflower or canola oil

4 tablespoons white wine vinegar or white vinegar

1/4 teaspoon freshly ground black pepper


With a fork or small whisk, mix all ingredients except the oils. Taste and add a little salt or sugar if desired. Stir in the oils and mix well. Leave garlic in the vinaigrette until ready to serve.

,


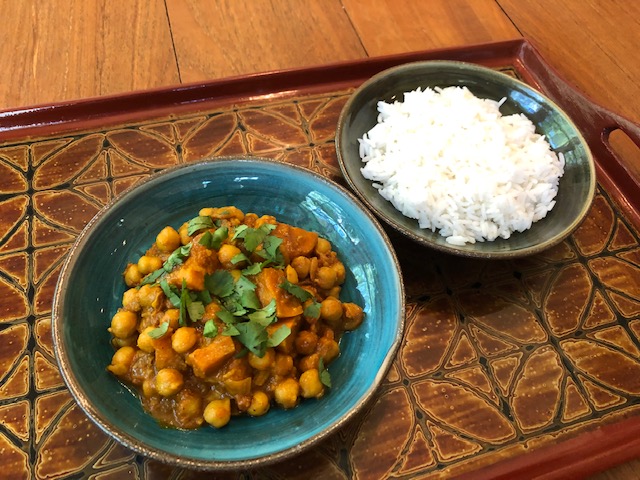
Chickpea Curry with Sweet Potato – Chole Shakarkand


Although I love curries and cook them frequently for home and the restaurant, I haven’t put many on this cookbook blog yet because they require a number of spices, some of which are rarely in American home pantries. But I will start posting some of my favorite curry dishes, and readers who get the basic spices will be able to make a number of  them.


Served with Basmati rice
I was familiar with Indian curries before I went to live and work in Southeast Asia for seven and a half years. But based in Malaysia, which has a sizable Indian population, I got plentiful exposure to curries from many parts of India, Pakistan and Sri Lanka, as well as Malay, Indonesian, and Thai curries. I also spent a number of months, for work, in India and Pakistan. Whenever I could, I got to know and cook with people who grew up in those countries, and ate extensively in local restaurants in Asia and ethnic restaurants in the US.


“Chole” is the more standard Indian vegetarian curry made with chickpeas (Kabuli Channa). It’s particularly associated with Punjab, in northwestern India and western Pakistan, but is made in other parts of the Subcontinent as well. A richer-flavored, fancier version is “Channa Masala.” Although Chole typically has chickpeas as the only vegetable, there can also be a second vegetable, such as spinach, added for variety. My granddaughter Clara, who does not eat meat, loves sweet potato curries, and Chole with sweet potato in particular. Chole can be served as part of a dinner along with other curries, rice and condiments, or it can be eaten more simply as the principal dish, accompanied by rice or chapati, which are thin griddle-baked wholewheat flatbread.


The recipe makes enough curry to serve six or more people. It should be accompanied by unsalted white rice, such as Basmati (see the index in this blog for a method for cooking Basmati rice), or with warm chapatis. Chole is typically garnished with chopped cilantro, and sometimes with diced onion as well.


1 large onion

1/4 cup sunflower, canola or other (not olive) vegetable oil, or part butter

1-inch piece raw ginger

1 large or 2 medium cloves garlic

2 teaspoons ground coriander

2 teaspoons ground cumin

2 teaspoons turmeric

2 teaspoons paprika

1/2 to 1 teaspoon cayenne

1/4 teaspoon black pepper

A pinch of ground cloves

1/2 cup canned crushed tomatoes or finely chopped fresh tomatoes

1/2 cup plain whole-milk yogurt

1 cup water, plus more as needed

1 medium-large sweet potato

1-1/4 teaspoon salt, plus more if needed

2 (14-ounce) cans chickpeas (garbanzos)

Several sprigs cilantro for serving


Finely dice the onion and fry it in the oil over low heat in a heavy pot, stirring from time to time, until starting to turn golden.


Meanwhile prepare the other ingredients. Scrape the skin off the piece of ginger, and mince the ginger finely together with the garlic on a cutting board, and set aside. In a small bowl, combine the seven spices. Have the ground or chopped tomatoes and the yogurt ready. Peel the sweet potato. Quarter it lengthwise, then cut it into 1/2-inch lengths and set it aside. Open the chickpea cans, and holding the covers in place, let the liquid drain off. Fill the cans with water and drain this off. Set the cans aside until needed.


When onions in the pot are becoming pale golden, add the ginger-garlic mixture and without raising the heat, stir and  fry it into the onions for 2 minutes. Add the mixed spices and stir and fry 1 minute. Add the tomatoes and yogurt. Increase the heat a little and heat the mixture, stirring frequently, until bubbling. Add the water, stir, and let the mixture simmer several minutes.


Add the prepared sweet potatoes and simmer them in the mixture, covering the pot but stirring often, until becoming tender (test them by piercing several with a toothpick). Stir in the salt. Add the rinsed and drained chickpeas and, stirring from time to time, let the mixture simmer, covered, about 10 minutes. If the liquid is drying down add some water as necessary to keep a creamy sauce in the pan.


Taste the sauce and several chickpeas. If they seem under-salted, add a little salt. Simmer another 5 minutes or so, and taste a final time, and add a little if needed. If the sauce has dried down, add a little water as needed. There should be some creamy sauce.


The curry can be served now or, for more mellow flavor, cooled, stored, then reheated to serve. (I like reheating in a casserole dish in the microwave, but the curry can be reheated in a pan on the stove, stirring and scraping the bottom of the pan well so the sauce doesn’t stick to the bottom.)

When serving, sprinkle some coarsely chopped cilantro on top. Accompany with boiled white rice or chapatis.


,


Salad Dressings: French Vinaigrette


This is one of three easy salad dressings I’m posting in the next few days that are, in my view, fresher, tastier, and certainly cheaper, than commercial bottled dressings. They are quickly made at home and are useful for simple salads of greens and maybe some tomato and a little julienned onion. (See the index in this blog for a number of other salad dressings and specialty salads.)


Vinaigrette, as salad dressing is termed in culinary French, is the diminutive of “vinaigre,” the French word for vinegar. “Vinaigre,” in turn, means soured wine, “vin” for wine and “aigre” for sour. Vinegar was traditionally produced by letting wine go the next step of fermentation, oxidizing its ethyl alcohol into acetic acid, which gives vinegar its sharpness. Virtually anything containing sugar that can be fermented into alcohol can be further fermented into vinegar: apple juice into cider vinegar, malted barley into malt vinegar, pineapple, rice, and sugar cane into their various international vinegars. Vinegar of any source, though particularly that from fermented grain, can be distilled to make purer, if less tasty, white vinegar.


Classically, a vinaigrette contains vinegar plus olive or other oil, salt and seasonings. But alternative acidic liquids, like lemon juice in the Mediterranean and lime juice in Thailand and Vietnam, can replace the vinegar in salad dressing and still, arguably, be called a “vinaigrette.” The traditional French proportion of oil to vinegar in vinaigrette is as much as 3 to 1. However, for lightness I generally use less oil than vinegar, and dilute the vinegar with water.


In France, salad – which traditionally comes after the main course and before the cheese and the dessert courses – is generally not accompanied by wine. The theory is that vinegar’s acidity spoils the taste of the wine, making it seem sour. But don’t feel sorry for deprived French diners. They’ve already had wine or wines with their starter and main courses and will have another wine with the cheese and often a dessert wine with the final sweet.


This is a typical dressing in restaurants in eastern France and nearby French-speaking Switzerland, where it’s used to dress simple green salads that accompany a dinner. Mustard, particularly Dijon mustard, is a standard ingredient in salad dressings there, as it is in making mayonnaise.


The recipe make enough dressing for six or more servings of salad. Extra stays reasonably fresh for a few days in the refrigerator.


1 clove fresh garlic

1/4 cup white wine vinegar or white distilled vinegar

2 tablespoons water

2 tablespoons mayonnaise

1-1/2 teaspoons Dijon or brown mustard

1 teaspoon sea salt or table salt

1/2 teaspoon sugar

1/8 teaspoon ground black pepper

2 tablespoons olive oil


Peel and crush the garlic clove with the side of the knife. Using  the back of a spoon or fork, rub the mixing bowl thoroughly with the garlic to leave its flavor in the bowl. Add the vinegar and let the garlic flavor it for a few minutes, then discard the garlic solids. Add the remaining ingredients except the oil to the bowl and mix until smooth with a fork or small whisk. Taste for salt (it should be a little salty to spread out on the salad vegetables). Add a little if needed. Using the fork or small whisk, thoroughly mix in the oil.


The vinaigrette can be used now or in the next few hours. If holding for longer, refrigerate it.


,


Salad Dressings: Balsamic Vinaigrette


Here’s another in the series of easy-to-make salad dressings for home use, that to me taste fresher and better -- and are certainly cheaper -- than bottled store-bought dressings. (See other salad dressings in the index on this blog.)


Balsamic vinaigrette may be the easiest dressing to make. In fact, it’s so easy that I’m almost embarrassed to write it up. But it is so delightful on a simple salad, or on a split avocado that I can’t resist.


The “Balsamic” vinegar used for salad dressings and for Balsamic reductions, the one available at supermarkets, is not that precious, intensely flavored Aceto Balsamico Tradizionale that comes from only two places in Italy. Rather the much cheaper “Balsamic Vinegar of Modena” is Italian wine vinegar mixed with grape must (fresh-pressed grape juice) and colored brown with caramel color. This is the Balsamic vinegar used for cooking and salad dressings.


Because of the grape must, Balsamic vinegar is mildly sweet. Therefore in this vinaigrette I don’t add any sugar.


The recipe makes sufficient dressing for a salad for six or more people. Its best prepared within several hours of use. However leftover dressing stays reasonably fresh for a few days refrigerated.


1/3 cup Balsamic vinegar (of Mode
na)

1/4 cup sunflower or canola oil or mixture of olive and other oils

1/2 teaspoon sea salt or table salt


Mix well. Taste, and, if needed, add a little more salt.

Follow Us @donderoskitchen