,

 Chicken Braised in a Healthy Vegetable Sauce


Recently, a friend was diagnosed with diabetes. He has typically enjoyed my cooking, and even calls me his “Food Buddy.” So I came up with a dish for him, based on the type of food he usually likes, but made it diabetic friendly: satisfying protein, fiber-containing but low-starch vegetables, plenty of flavor. There were no added carbohydrates, and only minimal oil and modest salt. Several quarts of my new Chicken Braised in Vegetable Sauce are being delivered to him this morning, as I write this blog article.


I researched ingredients that are best for my friend’s condition, and used several cooking tricks I’ve picked up over the years. I wanted the dish to be tasty enough that people without a restricted diet would 
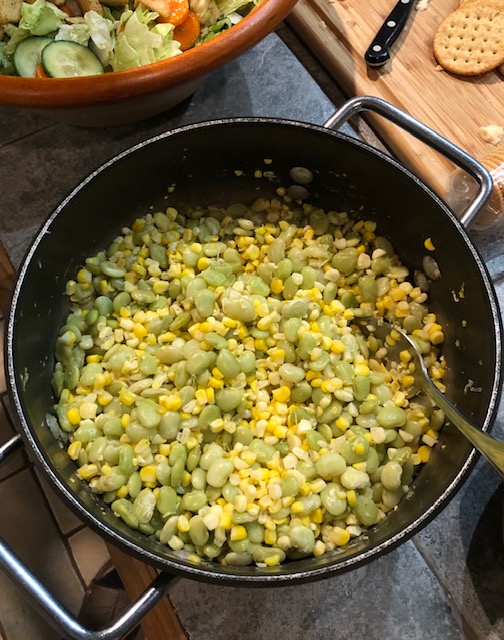
enjoy it and, ideally, not notice anything unusual. The dish is a thick stew with chicken and green beans in a richly flavored sauce. It can be eaten alone or accompanied by a salad. For those without restrictions the stew can  also be served with noodles, rice, potatoes or bread.


The recipe serves 6 people.


1 medium-small onion

2 cloves garlic

2 very small or 1 medium yellow or zuccchini squash

2 medium tomatoes

1 teaspoon olive oil

2 cups low-salt chicken broth or water

3/4 teaspoon paprika

1/4 teaspoon ground black pepper

1/4 teaspoon ground celery seed, or celery salt

1/4 teaspoon oregano

1/8 teaspoon cayenne

1 (12-ounce) bag frozen French-cut green beans

1 1/2 teaspoons salt (reduce to 1 1/4 teaspoons if using celery salt)

2 pounds boneless, skinless chicken breast


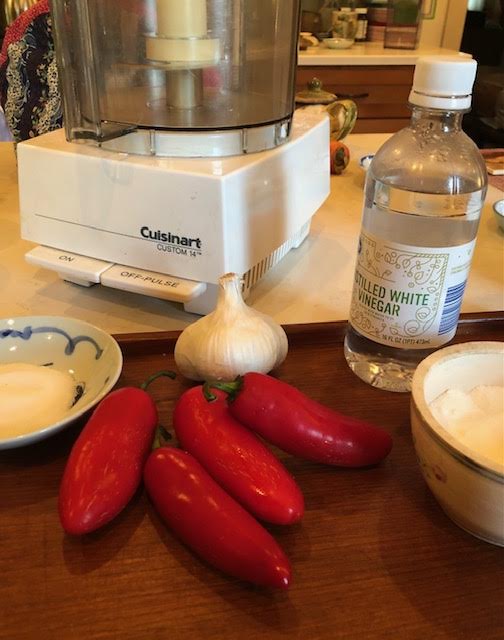
Peel onion and cut it in chunks. Peel garlic cloves. Cut tip ends off squash and cut squash into chunks. Cut core end out of tomatoes and cut flesh into chunks. Puree these vegetables together in a food processor, part at a time if necessary.


Transfer the mixture to a heavy pot. Add the olive oil. Cook over medium heat, stirring frequently and scraping the bottom of the pot. When the mixture begins to thicken add the chicken broth or water and seasonings other than the salt.


Simmer this mixture, covered, ten minutes, stirring occasionally. Meanwhile, prepare the chicken: Trim off all tough and fatty parts. Cut chicken flesh into 1-inch cubes.


When vegetables and liquid have simmered, add the frozen green beans. Stir and bring to a boil. Reduce to simmer, and cook, covered, stirring occasionally, until greenbeans are tender (10-15 minutes).


Add salt and bring heat back up to medium high. Add chicken and, stiring frequently, cook until tender and done, 15-20 minutes. If sauce is becoming dry, add a little water as needed. When cooked, check salt in the sauce and a piece cut off a chunk of chicken. If needed, add a little salt. The stew can be served now, or for richer flavor, refrigerated and reheated later.


Serve in shallow bowls like a stew. Accompany 
,


Tofu “Egg” Salad, a Vegan Treat


Here’s a home version of the vegan “egg” salad we make at the restaurant. The main difference is that at the restaurant we use a complex seasoning mix we developed for scrambled tofu that includes several spices that are hard to find in the supermarket. The simplified home version, however, makes a tasty tofu salad that is similar to what we do commercially, and is good for sandwiches as well as an appetizer.


Although crumbling the tofu by hand or a fork is quickest, a prettier dish is made by thinly slicing the block of tofu on a cutting board, then turning the board and slicing across those slices, then cutting through the pile of sliced tofu so it looks like tiny cubes. For best results, drain the block of tofu then stand it on its end to shed some liquid while preparing the other ingredients.


The recipe makes a pint of tofu salad, sufficient for four sandwiches or an appetizer spread for ten or more people. It will keep for several days in the refrigerator.


1 (14-ounce) block firm tofu

2 inch length of a celery stick

2 fairly thin green onions, white and green parts

2 tablespoons Dijon or brown mustard

2 tablespoons Vegan mayonnaise (such as Hellmann’s)

1 teaspoon cider or wine vinegar

3/4 teaspoon salt

1/4 teaspoon ground dry turmeric

1/8 teaspoon ground black pepper

1/8 teaspoon paprika

2 large pinches garlic salt (together less than 1/8 teaspoon total)

A pinch of cayenne


Drain water off the block of tofu and stand it up on its end in the emptied tofu container to drain some more liquid while preparing the remaining ingredients.


On a cutting board, using a chef’s knife, finely mince the celery and green onions. Transfer them to a mixing bowl. Add mustard, mayonnaise, vinegar, salt and spices. Mix well.


On the cutting board, thinly slice the block of tofu then pile up the slices, half at a time, and thinly slice through then to make long matchstick-shaped pieces. Turn the board and thinly slice across them to make diced tofu. This makes the most attractive tofu salad. Alternately, crumble the tofu with the hand or a fork, part at a time, breaking up any big chunks.


Add the tofu to the bowl and mix everything together well. Let sit ten minutes, then mix well again and taste, Add a little salt, if needed. Allow the salad to rest for at least half an hour or up to a day or two refrigerated to let the flavors mingle. Stir well before serving,


If using as a spread for the appetizer table, transfer to an attractive bowl or small platter. The surface can be dusted with paprika, if desired. If making sandwiches, some sliced tomato and spinach leaves make a nice addition.


,


Green Tapenade, an Easy Appetizer or Bruschetta Spread


Mediterranean French “Tapenade” is classically a mixture of minced or ground olives seasoned with capers, olive oil, and sometimes anchovies. It takes its name from “tapenas,” the Provençal word for capers. Mixtures of mashed olives and capers have been prepared in the Mediterranean since ancient Roman times, reportedly back then as a way to make use of the crushed olives and capers stuck at the bottom of the amphoras they were shipped and stored in. Tapanade traditionally is spread thinly on bread as an appetizer, especially to accompany wine. Here is a simple version made with green olives.


Both olives and capers can be somewhat salty, since salt is part of what preserves them. If a less salty spread is desired, the olives and capers can be rinsed briefly in running water in a sieve.


The recipe serves eight to ten people as an hors d’oeuvre or appetizer. Offer thinly sliced baguette, lightly toasted as for “bruschetta,” or spread on crackers or pieces of flatbread. A cold Sauvignon Blanc or Provençal rosé will pair with this dish.


1 cup pitted, non-stuffed green olives (rinsed if lower salt wanted)

3 tablespoons capers, drained (rinsed if lower salt wanted)

2 teaspoons extra virgin olive oil

3-inch length of green part of 1 green onion, optional


Using a cutting board and a chef’s knife, or a small food processor, or a mortar and pestle, finely mince the olives, capers and green onion, if used. Stir in the olive oil.


Transfer to a bowl to serve, accompanied by toasted bread, crackers, or flatbread. Alternatively, spread the tapenade thinly on the toasts and place on a platter to pass around for serving.


,


Deviled Smoked Turkey Appetizer


As holidays approach, I find myself making more appetizers for gatherings and receptions. “Deviled” treats, such as eggs or ham, lend a humorously evil touch as a party appetizer around a religious holiday, a church supper, a wedding, or to kick the New Year off to a good start. But let’s risk it!


That delightfully wicked association of the Devil with food typically means spicy, especially with sulfur-containing seasonings like mustard, black pepper and chilies. The concept of the Devil and Hell being connected with burning heat and sulfurous fumes (brimstone is an old name for sulfur) almost certainly comes from early people’s experience around volcanos and all that fire and bubbling and chaos and smell “down there” in the pit.


In my childhood a favorite sandwich spread and appetizer was “Deviled Ham,” which came in iconic small cans with a dancing, merry red devil on the label. That canned treat, however, goes back well before my childhood. It was created just after the Civil War by the Underwood Company, a canning business founded in Boston in the 1820s. Underwood had already become prominent producing canned foods that fed Union soldiers in the Civil War, and went on to can foods that pioneers took with them as they moved West. Of course, I didn’t know all that when I was a kid, only that Underwood Deviled Ham was luscious.


Although I enjoy pork, as should be apparent from numerous recipes in this blog, many people do not eat it. So rather than Deviled Ham, here is a fairly easy appetizer based on smoked turkey, which will appeal to a wider number of nibblers at the appetizer table. It hit me to use smoked turkey recently after I had a few slices as a snack from the deli counter. And smoked turkey that is sold sliced is easy to cut finely to make the appetizer. In addition to the obligate mustard, black pepper and chili, I’ve added diced canned pimiento and chopped pickle to give some color highlights.


The recipe makes a half pound, which with crackers will provide appetizers for ten or more people. The mixture should be made in advance, then stored refrigerated for at least a few hours or up to a day or two before serving, convenient for entertaining or taking to a pot luck.


While the point of the recipe is to make an appetizer with smoked turkey, using smoked ham instead of turkey makes a good dish also.


1/2 pound deli smoked turkey breast, sliced thinly (or smoked ham, see above)

Bread-and-butter or dill pickles sufficient to make 2 tablespoons after dicing

2 tablespoons canned diced pimiento, drained

3 tablespoons Dijon mustard

1 tablespoon mayonnaise

1 teaspoon vinegar

1/4 teaspoon cayenne

1/8 teaspoon ground black pepper

Salt if needed

Paprika for garnish


On a cutting board, using a chef’s knife, finely dice the turkey by stacking the slices then cutting them across into 1/8-inch slices, then turning them and cutting into 1/8-inch bits. Place in a mixing bowl. Place several slices of pickle on cutting board and dice them up with the chef’s knife. Measure 2 tablespoons, and add them to the bowl. Drain liquid off the measured diced pimiento and add pimiento to the bowl.


Add mustard, mayonnaise, vinegar, cayenne and black pepper. Mix well. Taste, and add a little salt if needed (smoked turkey varies in saltiness). Cover bowl and refrigerate at least several hours, or up to several days before serving. Stir the mixture well and taste. Add a little salt, but only if needed.


To serve, heap the mixture up on an attractive small platter or shallow bowl. Sprinkle lightly with paprika. Accompany with small crackers to spoon the mixture onto.

.

,


Smoked Salmon Tartare for Holiday Entertaining


Tartare (“à la tartare," in culinary French) means “in the Tatar (or Tartar) manner.” The original Tartare was finely chopped raw beef, typically mixed with raw egg, onion, and capers. Serving raw chopped beef was picked up by the Russians in past centuries from their nomadic Mongol-Turkic Tatar neighbors. “Steak tartare” is now a well-established European, especially French, dish.


My “tartare” leaves out the beef but, rather, contains quasi-raw smoked salmon. But like the beef original it includes capers and onion. Hard-boiled egg, optionally, can be used as a toping.


I’m noticing at the stores that smoked salmon is increasingly showing up with special flavorings, like black pepper, “Cajun,” “Pastrami,” or even Siracha. This recipe is for the simple smoked salmon that was, and to me still is, special enough.


The dish makes an elegant appetizer for a holiday buffet or a fancy appetizer for dinner. The recipe serves six or more as an appetizer with crackers or melba toast.


1/2 pound smoked salmon (cold-smoked, from Scotland or Norway, or hot-smoked, as from Alaska)

2 tablespoons finely minced red onion

1 tablespoon drained capers, coarsely chopped if larger than peppercorns

1 tablespoon snipped or coarsely chopped fresh dill, plus dill sprigs for garnish

6 hearty grinds of black pepper

1 tablespoon fresh lemon juice

1 hardboiled egg, white party only, finely minced, for garnish (optional)


On a cutting board, using a chef’s knife, finely chop the salmon (minus any skin). Mix well in a bowl with minced onion, seasonings and capers. Taste, and add salt only if needed (smoked salmon is salted). Refrigerate, covered, at least half an hour -- preferably overnight.


Serve in a decorative bowl or heaped up on an attractive small platter. Garnish, if desired, by sprinkling with minced hard-cooked egg whites. Top with dill sprigs.


Accompany with crackers, a plain, low salt variety, like water crackers, preferred,


,


Succotash – Old Fashioned Butter Beans with Fresh Corn


A country dish I remember from my childhood in southern New England is succotash, a combination of baby lima beans or butter beans simmered with fresh corn kernels. It turns out the combination of corn and beans goes back much further, to the indigenous peoples of the New England region. It was adopted into the earliest cuisine of the European colonists, and showed up at many Thanksgiving dinners. Its name derives from a word in the language of the Narragansett people, who once inhabited what’s now Rhode Island. 


I was reminded of succotash recently when writing an article about Brunswick Stew, a Southern dish in which the two succotash vegetables, cooked together, show up prominently. And then I had occasion to actually make succotash after all these decades when I was tasked with cooking butter beans (which are in fact small lima beans) for a family gathering and thought about adding corn off the cob. It was a big hit with several in the family, and gave me a twinge of nostalgia. Though it’s no longer familiar to a lot of people, especially outside New England, succotash is still a good dish.


Here’s a recipe that will serve six as a side vegetable.


1 (12-ounce) bag frozen butter beans or baby lima beans

1/2 cup water, plus more as needed

1/2 teaspoon salt, plus more to taste

1/4 teaspoon ground black pepper

2 large ears fresh corn on the cob

2 tablespoons butter


Heat a small pot with 1/2 cup water. When it boils, add the frozen beans, salt and pepper. Stir well. When the pot comes a boil again, reduce the heat to low, cover the pot and simmer/steam the beans. Stir frequently and add a little water as needed to keep 1/4 inch or so in the bottom of the pot. Cook until beans are tender, 10 minutes or more. 


While the beans are simmering, shuck the corn and remove as much corn silk as possible. With a sharp knife slice off the kernels, holding each cob upright in a shallow bowl to catch the corn as it’s cut off.


When the beans are tender, add the corn kernels and bring back just to a boil, adding a little water if needed to keep 1/4 inch or so in the bottom of the pot. The corn should simmer 1 1/2 to 2 minutes. Taste a few kernels to check that the corn is done. Do not over cook.


Remove from the heat. Holding the lid on the pot, tip the pot above the sink to drain off most of the cooking water. Add butter to the beans and corn, mix well, and taste. If salt is needed, mix it in.


Serve now, or after cooling, reheat it in a casserole bowl in the microwave before serving.

,


Vietnamese Pork or Chicken in Caramel Sauce with Turnip


This delightful Vietnamese stewed dish is something I encountered virtually every day at a student cafeteria in Hanoi, Vietnam during a 2-week pubic health course I helped teach in the mid-1990s. It was made with either chicken or pork, usually contained a vegetable, and was slightly different every day.


The local economy was such in those days that small portions of meat, with plentuful sauce, were served, basically to flavor the rice. American style allows for larger meat portions. Accompanying this dish was always a stir-fried green vegetable, often containing a little oyster sauce plus fish sauce and garlic for seasoning. The food provided to the course participants was modest and econimical, but I found it wonderfully flavorful.


I was surprized to encounter turnips in the cooking in Vietnam. They are otherwise uncommon in East and Southeast Asia. They may have been a Western introduction during the French colonial period, as were baguette bread, kohkrabi and artichokes.


Pork tenderloin and chicken cook reasonably quickly. Pork butt (shoulder) is tough, though very tasty, and takes longer to cook. The vegetable is added at the end because its cooking time is short.


The recipe serves six to eight with unsalted white rice. A stir-fried green vegetable dish would be a typical side.


2 pounds pork tenderloin or boneless pork butt; or boneless, skinless chicken thigh

3/4 pound purple-top turnip (1 medium-large)

A little vegetable oil, if necessary

6 tablespoons sugar

2 1/2 cups water, plus more as needed

3 tablespoons Asian fish sauce

2 teaspoons Chinese oyster sauce

4 large cloves of garlic, peeled and bruised

1 small-medium onion, quartered

1 inch fresh ginger, unpeeled, sliced thinly

2 small segments star anise (not the whole star piece)

2 slices hot chili pepper or 1/4 teaspoon cayenne

Salt, if needed

2 tablespoons cornstarch mixed with 3 tablespoons water

Cilantro or sliced green onion for garnish


If using pork, cut tough and fatty parts off the meat (save the trimmings). Cut meat into 1 1/2 inch pieces. If using chicken thigh, trim off fatty or tough parts (save the trimmings). Cut each thigh across into 3 or four pieces depending on the size of the thigh. Peel turnip and cut into 1/2-inch cubes. Set both aside.


In heavy pot, fry the pork or chicken trimmings over mediun-low heat to render some grease. Remove fried bits (they make great pet treats). If there is not 2-3 tablespoons of grease, add a little vegetable oil. Heat the pot to medium hot and add the sugar. Let it caramelize, without stirring, through dark red to brownish (it’s fairly quick). Then add the water to stop the browing. Add the seasoning sauces, garlic, onion, ginger, star anise and chili or cayenne and bring to a boil.


For pork: Add the pork to the boiling sauce, 4-5 pieces at a time, stirring, so that the meat surface changes color before adding the next batch. When all is in, let boil lightly for several minutes, stirring occasionally, then turn down heat and cover. Cook,stirring occasionally, until tender (about 10 minutes for tenderloin, 30-40 minutes or more for butt). Add the turnip. Simmer until it is tender, about 10 minutes, tasting the broth and adding some salt,if needed.


For chicken: Add the chicken pieces pork to the boiling broth, 4-5 pieces at a time, stirring, so that the surface changes color before adding the next batch. When all is in, let boil lightly for several minutes, stirring occasionally, then turn down heat and cover. Cook until tender (about five minutes). Add the turnip. Simmer until it is tender, about 10 minutes, tasting the broth and adding some salt, if needed.


For either pork or chicken: When the meat and turnip are tender, stir the cornstarch-water mixture into the simmering broth. Stir as the broth thickens, for several minutes. Taste and add salt if needed, and a little sugar if the sauce isn’t faintly sweet. Take out the ginger slices and star anise pieces as you see them. If the garlic and onion are still intact, remove them also.


The dish can be served now, but the flavor is enhanced if cooled, refrigerated and reheated to serve.


Sprinkle with coarsely chopped cilantro leaves or thinly sliced green onion tops.. Accompany with unsalted white rice.


,


Chili-Garlic Sauce, Malaysian Style


When we lived for those seven and a half years in Malaysia in the 1970s, we enjoyed many different styles of hot chili sauce, from Chinese, to Indian, to Malay (“sambal api”), to various commercial sauces that had flourished during British colonial period not many years before then. Many sauces represented fusions of the various culinary traditions that the immigrants and native people followed.


I do not remember what particular condiment I was trying to imitate when I started making this sauce, probably a Malay-influenced Chinese sauce. But I made it often while we were in Malaysia, then repeatedly in the US in the decades since. My chili sauce in jars is frequently given, and happily received, as Christmas gifts to family. There is always some in our refrigerator for highlighting stir-fry dishes, rice noodle dishes, and even scrambled eggs.


The Vietnamese-origin Huy Fong Siracha (“Rooster Brand”) sauce, which became wildly popular in the US, is not extremely different from what I started making before that sauce was launched here. That one was originally developed in the former Saigon, now Ho Chi Ming City, by David Tran, an ethnic Chinese business man from Vietnam, who made and sold it there. He started making it again when he and his family migrated as refugees to southern California, and the business went on to great success. His recipe is secret, obviously, but I do know that the chilies are entirely red jalapeños because they all used to be grown by my old college roommate, Craig Underwood, a 5th-generation farmer in Ventura County, CA.


Here’s the way I have been making this sauce for well over forty years, though I’m only now writing down the quantities of the various ingredients. Typically when red chilies are available, I make multiple quantities of the sauce and pack it in clean glass jars with non-corrosive lids, such as canning jars or used jelly jars or olive or pickle jars. That way I always have some for our use plus plenty to give away. The recipe is written for one pound of red chilies, though it is easily – and usually -- multiplied.


One recipe makes about a pint and a half. It stores for years in the refrigerator. Or if good canning procedures are used, the sauce can be stored on the shelf and only needs refrigeration after opening.


1 pound red jalapeño chilies or red Fresno chilies

2 medium-large cloves garlic, peeled

6 tablespoons distilled white vinegar

6 tablespoons sugar

1 1/2 teaspoons salt


Cut the green stems off the chilies, saving as much of the red flesh and seeds as possible. As you do this, cut the chilies across into halves and put them into a food processor or large blender. Add the garlic, vinegar, sugar and salt. Run the machine until the chilies are pureed, scraping down the inside of the container with a spatula several times.


Transfer the mixture to a stainless steel or enamel pan (not aluminum or cast iron). If doing multiples of the recipe, repeat the process with each batch. Bring the pan just to a boil, stirring frequently. Turn off the heat. With a large spoon, skim off any foam that has formed.


Spoon while hot into very clean jars, to a half inch below the rim. Wipe any sauce off the edge, and put the lid on the jar. Turn the jars over so the lid gets heated by the sauce.


Allow to cool overnight. Store in a cool place, or in the refrigerator.


The sauce needs a week or so for the flavors to emerge fully.


,


Potato Salad, German Deli Style


I prefer potato salad tangy sweet-sour and with little mayonnaise. This contrasts with the glubby, mayonaise-laden, yet somehow bland potato salad I grew up with. When I first tasted the striking potato salad at a German deli in New York, I never turned back. I keep the potato skins on, which the original would generally not, for convenience plus food value. And although I use relatively little mayonnaise, the vinegar makes the salad moist and creamy.


These days, I would keep the parsley as a garnish rather than mix it into the salad because some of my grandkids, as well as other young diners, avoid foods with “green things” in them. But the parsley would typically be mixed into the salad. If desired, coarsely chopped dill pickles can also be mixed into this salad. The potato salad is much better flavored if made ahead of time and refrigerated, a few hours to a few days, before serving.


The recipe serves 6 as a side dish or appetizer.


2 pounds small red- or yellow-skinned potatoes

2 tablespoons minced red onion

4 tablespoons white vinegar

2 1/2 tablespoons mayonnaise (“real” mayonnaise works best)

2 tablespoons sugar

1 teaspoon salt or to taste

1/4 teaspoon ground black pepper

1 tablespoon minced parsley for mixing in or for garnish


In large, uncovered pan with plenty of unsalted water, bring unpeeled potatoes just to a simmer over medium heat. Do not boil them or cover the pan. If water begins boiling, pour in a little cold water to slow it. Swirl the pan occasionally to gently move the potatoes around. After 8-10 minutes, test a potato for doneness by piercing with a toothpick. When tender except for firmness, but no hardness, at the very center, remove from the heat. Drain and cool.


In a large mixing bowl, stir minced onion, vinegar, mayonnaise, sugar, salt and pepper until mayonnaise is thoroughly mixed in. Peel or do not peel potatoes according to your choice. Cut potatoes into quarters lengthwise then cut them across into 1/4-inch slices. Add them to the bowl as they are cut.


Stir the potatoes into the mayonnaise mixture, mixing gently with a large spoon or hands (wear plastic gloves). Let sit for 15 minutes. Mix well again and taste. If necessary, add salt, vinegar and/or sugar. The taste should be slightly salty (the potato will absorb more) and tangy sweet-sour. Refrigerate until used. If combining the parsley into the potatoes rather than garnishing with it when serving, stir it in now.


An hour before serving, stir potato mixture again. Taste and add salt, if needed. Transfer to a serving bowl or platter and sprinkle with minced parsley if it was not already mixed in.

,


Chicken and Dumplings – an Old-Fashioned Treat


This one-pot dinner goes way back. In the US, it was mentioned as early as 1836 in a cookbook from Virginia. The dish later showed up in the lyrics of the American folkloric “sing-along” or “campfire song,” “She’ll be Comin’ ‘Round the Mountain when She Comes” which originated in the late 1800s. There, “Chicken ‘n Dumplins” is excitedly anticipated to celebrate a welcome guest’s arrival. I had this down-home treat fairly often when I was a kid, but haven’t seen it, much less cooked it, in many years.


Here’s the way I remember Chicken and Dumplings, but modernized a little on the seasoning and without the chicken bones. Based on my grandkids’ reaction when I served it to them recently, it’s still a family-pleaser. I used the convenience of store-bought biscuit mix (“Jiffy Mix,” “Bisquick” or the store brand) rather than making the dumplings from scratch. A homemade baking-powder biscuit recipe could instead be used to make the dumplings, but that’s extra work.


The recipe serves six. The chicken part can be done ahead, refrigerated in the pot, then brought back to a low boil to add and cook the dumplings 15 minutes before serving. A salad is a nice accompaniment.


2 pounds boneless, skinless chicken thighs

2 tablespoons flour for the chicken

3/4 teaspoon salt for the chicken

1/2 teaspoon ground black pepper for the chicken

1/8 teaspoon cayenne for the chicken

1/8 teaspoon nutmeg for the chicken

3 tablespoons rendered chicken fat plus olive oil if necessary

1 medium onion, diced

1 stick celery, split lengthwise then thinly sliced

2 medium carrots, peeled and cut in 1/4-inch thick discs

2 cups chicken broth

Water, as needed

1/4 cup  sour cream

1/2 teaspoon salt

1/2 teaspoon paprika


The Dumplings:

2 cups commercial biscuit mix (like Jiffy Mix, Bisquick, or store brand)

2/3 cup milk


Trim the chicken of fat and any tough parts (save the trimmings to fry for grease). Cut crosswise into 3 pieces, or 4 if the thigh is large. Mix well with the flour, salt. pepper, cayenne and nutmeg, and allow to season while preparing the other ingredients.


In a stew pot or Dutch Oven, slowly fry the chicken trimmings to render some chicken grease. Remove the browned solids (they’re great pet treats). Keep about 3 tablespoons drippings, or add some olive oil if needed to reach that amount..


When the fried chicken trimmings have been removed, turn up the heat under the pot and add the floured and seasoned chicken. Fry over high heat, scraping the bottom of the pan with a metal spatula and turning the chicken almost constantly. When all the raw color is gone, remove from the heat and lift out the chicken to a bowl, keeping any grease in the pot. Add a little more oil if all the grease is gone.


Add the onion, celery and carrot to the pot. Stir the mixture well and scrape the bottom of the pot. Fry this way 2 minutes. Add the chicken broth and simmer the vegetables, covered, stirring often, until the carrots are tender when pierced with a toothpick. 


Add the sour cream, salt and paprika. Add the pre-fried chicken. Add a little water, if needed, so that the liquid reaches to near the top of the chicken and carrot pieces. Bring back to a boil and simmer 2 minutes. Taste the sauce and add a little salt if needed.


At this point the dumplings can be added, or the stew can be cooled, refrigerated and reheated later to finish and serve.


For the dumplings, place the biscuit mix in a dry bowl. Make a hole in the middle of the biscuit mix. Pour in the milk, and lightly mix with a fork till fully moistened, but do not mix further. With a spoon and a spatula, put roughly 3-tablespoon lumps of dumpling dough evenly on top of the chicken and sauce. Cover the pot tightly, reduce the heat to simmer, and allow the dumplings to cook for 14 minutes without opening the pot.


Uncover, and serve the chicken and dumplings from the pot.

,


Thai Soy Sauce Chicken – a Versatile Side Dish or Snack (with Gluten-Free Option)


I was introduced to this easily made chicken dish, Gai See Ew, by my sister-in-law, Nai, who is from Chaing Mai in northern Thailand. She prepared it as an add-on, a substantial condiment, for the savory garnished rice soup, “Khao Dom,” that she served for a crowd. The luscious morsels of seasoned chicken were placed in a serving bowl near many other small dishes – tiny pork meatballs, fried garlic, pickled cabbage, green onion and cilantro – offered buffet-style for guests to spoon onto their soup. Soy sauce chicken is home cooking rather than a restaurant dish.


I’ve made these treats as a topping or side dish for Thai food, and just for a snack aimed at my chicken-loving grand kids when they come to dinner. It goes well on top of an Asian noodle soup, like Ramen, or a garnished rice bowl. Thai soy chicken also makes a great (and easy) snack for a picnic-like gathering or appetizer buffet.


One batch of the recipe below will make nibbles or add-ons for six people. Since the chicken pieces are marinated then fried, if multiples of the recipe are used, the frying should be done in batches so that the chicken actually fries fairly dry rather than stews, which would happen if the chicken pieces were too crowded in the pan.


Typical soy sauce contains gluten, since some wheat is fermented in with the soybeans in its production. If gluten needs to be avoided, use a gluten-free Tamari-type of soy sauce. No other ingredient in the dish contains gluten.


1 pound boneless, skinless chicken breast

1 tablespoon soy sauce (see above if gluten must be avoided)

1 small clove garlic put through a garlic press or very finely minced

1/2 teaspoon cornstarch

1/2 teaspoon sugar

3/8 teaspoon salt

1/8 teaspoon ground black pepper

1/8 teaspoon cayenne

2-3 tablespoons vegetable) not olive) oil for frying

Several sprigs of cilantro for garnish, if desired


Trim off any tough or fatty parts of the chicken. Cut the chicken flesh into small pieces 1 1/2 inch by 1/2 inch by 1/2 inch in size. Mix well with the soy sauce, garlic, and dry ingredients. Allow to marinate, mixing occasionally, for at least an hour. Refrigerate if longer than that.


If making more than a single batch of chicken (1 pound), cook it in several lots of about one batch each so that the chicken pieces fry rather than stews.


Heat a large wok or frying pan to medium high. Add 2 tablespoons frying oil and when it’s hot add the chicken. Immediately begin stirring and frying the chicken pieces and scraping the bottom of the pan,  using a metal spatula or wok spatula. Cook this, stirring almost constantly, until no raw color remains and the surfaces start to turn golden, 5-7 minutes. Cut a piece of chicken in half to be sure the pink color is gone. Remove the chicken to a platter.


Serve warm as part of a meal, or at room temperature if using as an appetizer or part of a buffet.

,


Chicken Medallions with Fresh Herbs and Lemon – Chicken as a Side Dish


My grand kids, especially the boys, like chicken in small pieces, seasoned, which they can pile onto sandwiches, sprinkle on their pasta, or eat with rice. Here’s one I developed out of two Italian dishes I've enjoyed, in which seasoned chicken is sautéed and served nearly dry. The inspirations were both from Tuscany, pollo al limone (chicken with lemon) and pollo alle erbe (chicken sautéed with fresh herbs).


Because my grandsons, like many adolescents, do not like bits of green “stuff” in their food, I’ve kept the fresh herb sprigs intact during the marinating and roasting so they and fallen-off leaves can easily be removed for the benefit of young eaters.


The recipe is based on one pound of boneless, skinless chicken breast, but it can easily be increased depending on how many diners you have who eat chicken. Leftovers are useful.


For every pound of skinless, boneless chicken

5 sprigs of a mixture of various fresh herbs (rosemary, marjoram, oregano, sage, parsley, chives)

 (If only parsley available, add 1/4 teaspoon dry oregano)

1 small clove garlic put through a press or finely minced

1 tablespoon fresh lemon juice

1/2 teaspoon cornstarch

1/2 teaspoon salt

1 tablespoon olive oil

Fresh herb sprigs for garnish


Trim fat and any tough parts off the chicken. Cut into pieces 1 1/2 inches long by 1/2 inch by 1/2 inch.


In a bowl, combine the remainder of the ingredients, with sprigs of herbs intact. Mix well so that herbs start to macerate and soften. Stir in the chicken. Marinate for at least an hour, stirring frequently, so that the chicken gets exposed to a variety of herbs.


Set oven for 375 degrees. Spread chicken (and herbs) out on a large baking pan so there’s a little space between pieces.


Roast for 8 minutes. With a spatula, stir and turn the chicken pieces so they don’t stick together. Roast another 6 minutes, and stir again. The chicken should be cooked. Cut a larger piece in half to be sure the pink color is gone. If still pink in the middle, roast 3 more minutes. Let chicken cool. Pour off any juices. Discard the cooked herbs.


Place on a serving platter. Garnish with several sprigs of fresh herbs. Serve warm or at room temperature.

,

 Butternut, Pumpkin, or Kabocha Casserole – a French-Style Gratin


French cuisine, especially from the southeast of France, includes many wonderful and varied “au gratin” vegetable dishes. The common denominator seems to be baking with  cheese and/or oiled or buttered breadcrumbs.


This recipe is for a hearty, cold-weather gratin casserole of winter squash or the somewhat flat European-style pumpkin, French “courge” or Italian “zucca.” These are sometimes available here at farmer’s markets and called “heirloom” pumpkins. The Japanese “Kabocha squash” is fairly similar. In the US, the most readily available of these vegetables (though technically they are all “fruits”) is butternut squash. The dish can be the vegetable in a dinner, or a supper or lunch accompanied with warm baguette. The recipe serves six.


1 medium-large butternut squash or Kabocha (2 1/2 to 3 pounds)

3/4 teaspoon salt for vegetable plus 1/2 teaspoon for sauce

1 1/2 cups (loosely packed) coarsely grated Cheddar or Gruyère cheese

2 tablespoons grated Parmesan or Romano cheese

3 tablespoons butter

2 1/2 tablespoons flour

1 1/2 cups whole milk, or part cream

1/2 teaspoon ground black pepper

1/8 teaspoon grated nutmeg

A pinch of cayenne

4 tablespoons plain breadcrumbs moistened with 1 tablespoon olive oil or melted butter plus a sprinkle of salt


Cut off the stem and bottom ends of squash. Peel the squash. Cut it crosswise into 1/2-inch slices, scooping out the seeds with a spoon when you get to them. Cut the squash slices into 1-inch square pieces. Steam them over boiling water, stirring them once or twice, until tender (test with toothpick), about 15 minutes.


Cool the steamed vegetable, then transfer it into an attractive casserole dish. Sprinkle with about 3/4 teaspoon of salt, part at a time, and mix to season evenly. Top with the cheeses and mix them in gently.


Set the oven for 375 degrees.


Prepare béchamel sauce:  In heavy pan over medium heat melt butter with the flour. Cook mixture 2 minutes, stirring. With whisk, mix in milk or milk and cream and continue to whisk until the sauce comes to a boil. Let simmer, whisking frequently, until thickened,  2-3 minutes. Remove from heat and stir in 1/2 teaspoon salt, plus the pepper, nutmeg and cayenne.


Spoon sauce evenly over the vegetable in the dish and gently mix it in a little. Finish by sprinkling on the oiled or buttered breadcrumbs. With moistened paper towel, wipe off any sauce and vegetable stuck to the edges of the baking dish.


Bake in the middle of oven until the sauce is bubbling and the surface begins to brown, about 20-30 minutes. Serve hot. Or the baked dish can be cooled, refrigerated, and re-baked just long enough to he
,


Pasta with Smoked Salmon and Peas -- Easy


Smoked salmon is not common in Italy, while in Northern Europe, especially Scandinavia, it is extremely popular. But in Italy this special fish has one principal use: tossed in with pasta. Here is an attractive and super-easy pasta dish with smoked salmon and peas.


Like other pasta with seafood dishes, this one does not contain cheese. Cheese can be used in the antipasto, or strips of cheese, like Parmesan sliced off the block with a vegetable peeler, can be served on the salad.


The dish is made fresh and served hot. The recipe serves six. A salad is a nice accompaniment.


A hearty, chilled white wine, such as an un-oaked Chardonnay or a Viognier, or a somewhat cooled Pinot noir or Chianti (20 minutes in the refrigerator before serving) would be my pairing with this dish.


1 medium-large clove garlic

2 tablespoons olive oil

3/4 cup heavy cream

3/4 teaspoon salt, plus more if needed

1/2 teaspoon paprika

1/8 teaspoon black pepper

A pinch of cayenne

1 cup frozen peas

4 ounces smoked salmon, cold-smoked preferred

1/2 pound short pasta, such as penne or farfale (“bow ties”)

A little of the hot water from boiling the pasta, saved


Heat a large quantity of water for cooking the pasta. Keep it hot until time to cook the pasta.


Put garlic through a garlic press or mince it finely. Place in a large microwaveable bowl, from which the pasta will be served. Add olive oil, mix with the garlic, then microwave for 1 minute.


Add cream, salt and spices, and microwave 1 minute. Mix in frozen peas and hold until pasta is nearly cooked.


Cut salmon into 1/2-inch squares and keep ready for tossing with the pasta.


Add a teaspoon salt to the pasta water and boil the pasta, stirring constantly for the first 30 seconds so pasta does not stick together, then often during the cooking. After 7-8 minutes, depending on the pasta, cool then bite into a piece of pasta to test for tenderness. As soon as all crunch is gone from the pasta and it starts to become tender, drain it, saving a little of the cooking water in a cup.


Put the bowl with the cream and pea mixture back in the microwave and heat for 2 minutes, or until peas are hot. Stir, add the cut salmon and the drained, cooked pasta and toss well. If the sauce is dry, add a little of the hot pasta-cooking water. Taste, and if under-salted, add a little (the salmon may be salty, so be cautious).


Serve immediately.

Follow Us @donderoskitchen