,


Ranch: America’s Favorite Salad Dressing


For the past thirty years Ranch Dressing has been the best-selling salad dressing in US grocery stores. A survey of food preferences in 2017 showed Ranch to be the favorite dressing of about 40 percent of Americans, way above any other dressing. I’ve wondered if its popularity initially developed because the dressing clung to and considerably enhanced the otherwise dull iceberg lettuce that was then the prevalent salad green.


This morning at our local supermarket I counted 19 different types of bottled Ranch dressing, many with added flavors like “Siracha,” chipotle, or dill. But that was just on the store’s dry-goods shelves. Nine other varieties filled the produce department’s refrigerated shelves near the salad greens. “Ranch” or “Cool Ranch” flavor has also been added to all kinds of snack foods, including potato chips, corn chips, popcorn, and even taco shells. There are several varieties of dry mix, mostly from Hidden Valley Food Products Company, to make ranch dressing at home or in the restaurant kitchen. For the food industry, Ranch Dressing has clearly been a phenomenon.


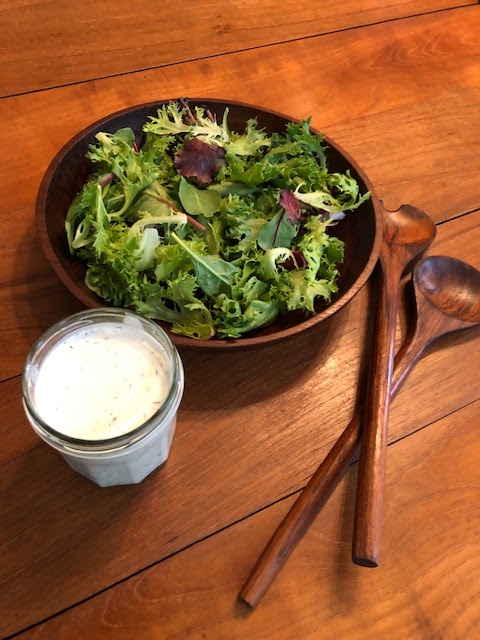
The classical Ranch dressing is the familiar creamy white liquid with tiny green herbal specks, a pleasantly mild acidity, and overtones of garlic, onion, mustard, dill and parsley. The typical (and original) formulation is about half mayonnaise and half buttermilk, with some added seasonings. There are now also vegan versions without dairy and with no egg in the mayonnaise.


It all began in 1949, when an obviously creative fellow, Steve Henson, from Nebraska, moved with his wife to Alaska. There he became a very successful plumbing contractor, making a huge amount of money building houses in the Alaskan bush. While out at the job sites, Henson created a salad dressing that he served with the meals he provided to his workers.


After only three years in Alaska, at age 35 and feeling wealthy, Henson and his wife “retired” to Santa Barbara County, CA. There in 1956, they bought a ranch in San Marcos Pass, and renamed it Hidden Valley Ranch. They turned the place into a sort of dude ranch for guests. In developing the dining menu Henson brought back his salad dressing from Alaska days. The guests liked it, both on salads and on steak, and many wanted to buy it to take back home. As demand built for his dressing Henson began offering packaged mixes so people could make their own. By 1957, the mix was being sold locally in stores. Although the guest ranch closed in the mid ‘60s, Henson’s mail order business for his “ranch dressing” prospered. The Hensons established Hidden Valley Food Products, Inc. and enlarged the production facilities. The business continued to flourish, and in 1972  it was bought out by Clorox, of which Hidden Valley Foods Company remains a subsidiary, though quite unrelated to the parent company’s main products. Several reformulations of the product followed, including a shelf-stable bottled dressing that was introduced in the early 1980s.


Numerous other food companies, meanwhile, had introduced “ranch style” dressing mixes, and subsequently bottled dressings to compete. Lawsuits and copyright challenges followed for a while. But finally, ranch dressing in all its variations remains super plentiful in the market, as I witnessed this morning. Hidden Valley, who calls its products “The Original Ranch,” remains among the contenders, but with a minority of the ranch dressings offered.


In addition to bottled dressing,  Hidden Valley’s powdered dressing mix remains available. And by the way, monosodium glutamate is its first-listed ingredient.


That’s a long introduction but, hey, that’s the commercial food biz. How about making Ranch Dressing at home from scratch? In my view, homemade salad dressings are always better, to say nothing about fresher and less expensive, than commercial ones.

. 

In this recipe I substitute readily available yogurt and a little sour cream for the original buttermilk. That old-fashioned product is rarely in home refrigerators now, and it’s generally only sold by the quart, which would be wasteful. Another accommodation, I substitute a green onion for the dried chives and onion that would have been used originally. For the dill, fresh is nice, but dried dill weed is easier to keep on hand, and would have been in the dry mixes that built Ranch dressing’s popularity. And rather than dry mustard powder, which few have on hand these days, I use Dijon or brown mustard. Finally, I don’t use MSG. That flavor enhancer, apparently, is typical in most bottled and dry versions of Ranch dressing.


The recipe makes somewhat over a pint. Store in a screw-capped jar in the refrigerator, and shake the jar before using the dressing.


1 cup yogurt, low-fat

3/4 cup mayonnaise

1/4 cup sour cream

1/4 cup water

1 teaspoon Dijon or brown (not yellow) mustard

1 thin green onion, white and green parts, roots removed

2 sprigs flat parsley, rinsed

1 small clove garlic

1 1/2 teaspoons salt

1 teaspoon sugar

1/2 teaspoon dry dill weed

1/2 teaspoon ground black pepper


In a large bowl, place the yogurt, mayonnaise, sour cream, water, and mustard.


On a cutting board, using a chef’s knife, finely mince the green onion and parsley. Put the garlic through a garlic press, or very finely mince it in with the green onion and parsley. Add these to the bowl. Add the salt, sugar, dry dill, and black pepper. Mix the dressing thoroughly with a whisk or fork. Hold for at least ten minutes before using, and mix it again.


The dressing can be stored in the refrigerator in a screw-capped jar for up to a week or two.


Use as a salad dressing, a dip for french fries, potato chips, or artichoke hearts. Or (as was done at the original Hidden Valley Ranch) drizzle it on grilled steaks or burgers.


,


Eggplant Gratin – Provençal Gratin d’Aubergine


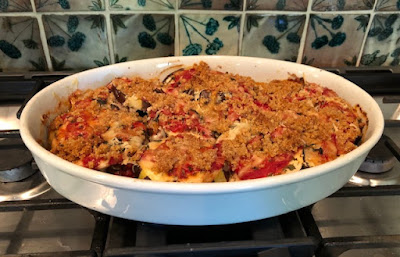
Late summer brings both eggplant and tomatoes. That’s when in the south of France Eggplant Gratin – “Gratin d’Aubergine” -- was was most common in the old days. Now with produce available year round, the dish can be enjoyed anytime.


Southeastern French cuisine includes many wonderful vegetable gratins. There are seafood and meat gratins as well. “Gratin” indicates topping with grated cheese and/or breadcrumbs and baking in a shallow dish till crispy on top. Gratins of potatoes, cauliflower and other winter vegetables typically lack tomatoes but contain milk, often in a creamy béchamel sauce. Two gratins that I’ve had in France are different, eggplant gratin and “Tomates Provençale,” which is a sort of gratin but not called that. Both contain cheese and breadcrumbs plus tomatoes, but no milk. They both taste very fresh, and are somewhat lighter than some of the winter gratin dishes.


Eggplant gratin has some similarities with  Eggplant Parmesan, or “Melanzane alla Parmigiana,” a dish from southwestern Italy, down the Mediterranean coast from French Provence. But in the heavier Italian dish the eggplant slices are coated with egg and flour or breadcrumbs and pre-fried or pre-baked before assembling the dish. Plus considerable mozzarella cheese is used in addition to the namesake Parmesan cheese. And there are no breadcrumbs in the topping. For French eggplant gratin, which similarly uses Parmesan cheese, the eggplant is merely salted to remove its bitterness, and mozzarella is not usual.


In this recipe, I use the traditional Parmesan cheese (domestic is good enough for this baking), but in addition for a creamier cheese inside the dish I use Gruyère, or for a more economical dish grated Jarlsberg or “Swiss” cheese works satisfactorily. The dried herb mix “Herbes de Provence” is an important seasoning for this dish. It’s available at the spice and herb section at most supermarkets. A substitute would be a mixture of thyme, marjoram and oregano.


The recipe serves six as a luncheon or principal dish, or will serve more as a side dish. The gratin can be made ahead and re-heated before the meal.


This dish pairs nicely with lighter-bodied red wines (chilled about 20 minutes in the fridge before drinking to take off the summer warmth). A red Beaujolais, Côtes du Rhône, or Pinot Noir will work and be geographically appropriate.


2 medium eggplants (about 1-1/2 pounds)

2 tablespoons salt for soaking the eggplant

3 tablespoons olive oil for the casserole dish

1/4 pound (about 3/4 cup) grated Gruyère or Swiss cheese (domestic)

1 (14-ounce) can crushed or “ground” tomatoes

1-1/2 teaspoons salt for the baking

2 teaspoons dry Herbes de Provence (or see notes above)

2 teaspoons chopped fresh basil leaves

1-1/2 cups grated Parmesan cheese (domestic wedge is OK)

5 tablespoons dry breadcrumbs mixed with 2 tablespoons olive oil for topping


Rinse off the eggplants. In a large bowl, combine two quarts of water with 2 tablespoons of salt. Cut stem tops off the eggplant and cut a thin piece off the bottom ends. With a vegetable peeler or sharp knife cut off three narrow strips of peel lengthwise equally separate from each other (so skin isn’t continuous when the eggplant is sliced). Slice the eggplants crosswise into 1/4-inch-thick circles. Soak these in the salted water, mixing them occasionally, at least 30 minutes.


Open the can of crushed/ground tomatoes and mix in the 1-1/2 teaspoons of salt plus the Herbes de Provence and chopped fresh basil. Set aside.


Set the oven for 350 degrees.


Using a shallow casserole dish from which the gratin will be served, pour in 3 tablespoons of olive oil and tip the dish to have the oil coat the bottom and part of the sides of the dish.


Drain the eggplant slices. Place half of them in the oiled casserole dish, slightly overlapping. Press them down lightly. Sprinkle evenly with half of the grated Gruyere or Swiss cheese. Then spoon half of the crushed/ground tomatoes (containing the seasonings) evenly over the top. Sprinkle with half the grated Parmesan. Then repeat these steps with the second half of the ingredients, finishing with the Parmesan.


Moisten the breadcrumbs with the olive oil. With your fingers crumble this evenly over the top of the casserole.


Bake in middle of oven until the juices are bubbling and the topping begins to brown, about 40-50 minutes.


Serve hot. Or the baked casserole can be cooled, refrigerated, and re-baked just long enough to heat through before serving.

,

                                   Campari Tomatoes – and an Amazing  Salad 


I don’t know how I missed these for so long. “Campari” tomatoes are 2-3 inch round, richly red fruits with outstanding tomato sweetness and flavor, and no hint of mealy texture. They’re usually sold “on the vine.” Camparis make a great salad, and are wonderful on BLTs, in fresh tomato chutney, and other dishes showcasing rich tomato flavor and sweetness.


I’d been vaguely aware of Campari tomatoes at the supermarket and picked some up once or twice at Christina’s request. But until last week, when I had some homegrown, ripe-on-the-vine, peak-of-season tomatoes at the in-laws’ in Pennsylvania, I had forgotten how extraordinary a really good tomato could be. Without access to homegrown wonders, for us the next best thing may be Campari tomatoes. And they’re available year round!


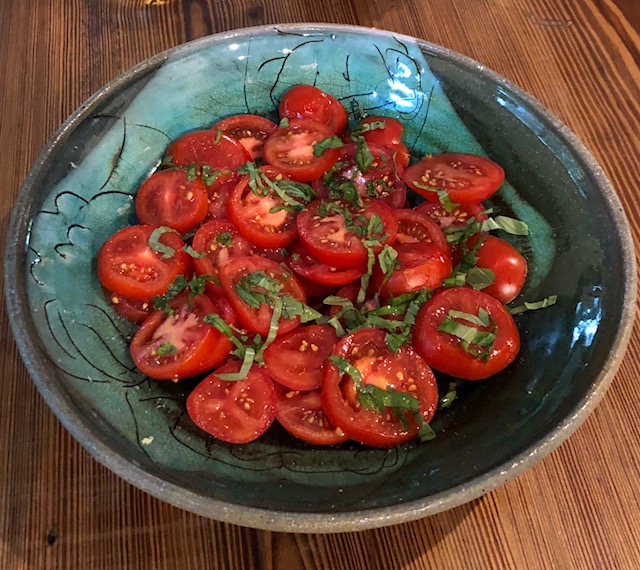
Camparis were developed in the early 1990s by a Dutch seed company for greenhouse hydroponic culture. The variety is a hybrid, but not genetically modified (few if any tomatoes are GMO), and when raised in greenhouses do not need pesticides for disease or pest control. Campari tomatoes are now grown extensively in Canada, where greenhouse vegetable production is a major industry due to their short summers, plus in Mexico and in some parts of the US. (The ones I got for the tomato salad pictured in this blog post were grown in Mexico and sold under Kroger’s own premium house label.)


The tomatoes were trademarked “Campari” in 2002 by a Canadian agricultural company, whose trademark has been challenged. But apparently the tomatoes were already called “Campari” in Holland, named for the century-and-a-half old Italian herbal liqueur that has that a rich carmine color, and which was originally dedicated by its creator, a gentleman named Gaspare Campari, to Holland. So the culinary favor was returned by the Dutch. Campari tomatoes do have almost the color and sweetness of Campari liqueur, but none of its distinguishing bitterness. In any case, “Campari” is certainly a classy name for a classy variety of tomato.


At the risk of too much information, I’ll note that the word “tomato,” or “tomate” in Spanish and French, comes from “tomatl” in the Nahuatl language of the Aztec people of Pre-Columbian Mexico, who grew the vegetable. However in Italy, home of  the original Campari, a tomato is a “pomodoro,” a golden apple. And botanically, tomatoes are a fruit, a type of berry, rather than a “vegetable.”  (Sorry, but I almost went into botany and agricultural biochemistry years ago.) For best flavor, tomatoes should not be refrigerated, unless they are starting to get old.


So now a simple dish that shows off the wonders of Campari tomatoes. They are already so good I only add light touches to the basic ingredient, a rub of garlic in the salad bowl, a little sea salt, extra-virgin olive oil, wine vinegar plus a bit of fresh basil. That last item can be left out if not wanted or unavailable.


The recipe serves six people.


1 clove garlic

1 pound “Campari” tomatoes

2 tablespoons extra-virgin olive oil

1/2 teaspoon wine vinegar, white or red

1/4 teaspoon sea salt, plus more to taste

5-10 small leaves fresh basil (can be omitted)


Rub a decorative ceramic salad bowl with the garlic, to flavor it, after partially crushing the garlic clove. Discard the garlic remains.


With very sharp knife, slice the tomatoes 1/8-inch thick, after slicing off their stem ends. Place tomato slices in the garlic-rubbed bowl. Sprinkle the tomatoes, but do not mix them yet, with the olive oil, vinegar, and salt.


Stack up the basil leaves and slice them finely crosswise. Sprinkle these over the salad. Do not mix until a few minutes before eating. Keep at room temperature if the salad will be consumed in the next several hours.


Just before dinner time, carefully mix the salad a few times. Taste, and add a little more 
,


Pork and Basil Meatballs with Simple Tomato-Basil Sauce


Maybe its in my DNA, but I love fresh basil. The Donderos were originally from Genoa, on the northern Mediterranean coast of Italy. And Genoa is the home of Genovese basil and that amazing basil-pine nut sauce, Pesto (check the index on this blog for my post on Pesto with Pasta, and also for the post on the fresh mozzarella, basil and tomato salad from further south in Capri, called “Caprese”) .


With plentiful basil in my garden this summer, I’m doing many dishes with that delightful fresh herb. Here is one I just came up with, roasted pork and basil meatballs with an easily made tomato-basil sauce. Fresh basil is used in the meatballs, the sauce, and as a garnish when serving.


The recipe serves four to six as an appetizer course or four as the meat for a light summer meal. These are best served hot.


Make the sauce before, or while, roasting the meatballs (see below), and let sauce cool.


Tomato-Basil Sauce:

2 medium-large fresh tomatoes

2 tablespoons olive oil

3 large fresh basil leaves, whole

Large pinch ground black pepper

1/4 teaspoon sugar

Salt to taste, starting with 1/8 teaspoon


Core the tomatoes and chop them fairly finely on a cutting board, using a chef’s knife.


In a small pan, heat the olive oil. Add the chopped tomato and stir well as it comes to a boil. Add the basil leaves, pepper, sugar and salt. Stir frequently and boil until tomatoes thicken and dry a little, 5-10 minutes. Remove basil leaves. Taste and add a little salt if needed. Let sauce cool


Meatballs:

4 medium-sized fresh basil leaves, finely minced

About 2 tablespoons worth of onion, finely minced

3 tablespoons unseasoned breadcrumbs

1 egg

1 teaspoon salt

1/4 teaspoon black pepper

1/4 teaspoon dry oregano

1/4 teaspoon ground allspice

2 tablespoons water

1 pound fairly lean ground pork

Mince the basil and onion together on a cutting board with a chef’s knife. Place in a mixing bowl with remaining ingredients except pork, and mix well. Add ground pork and mix, kneading the ingredients together well.


With hands, shape into 12 meatballs, roughly the size of a walnut (easiest if you divide the meat in half then half again, then make 3 meatballs out of each quarter). Place on lightly oiled baking sheet. Roast in 350-degree oven for ten minutes. Turn meatballs by sliding a sharp metal spatula under them and turning them over. Roast another 15 minutes.


Serving:

When meatballs are done, place them on a platter around a small bowl, into which you spoon the tomato-basil sauce. Garnish the platter with several small sprigs of fresh basil.


Diners spoon a little sauce on their meatballs on their plates.

,


Spaghetti alla Putanesca: a Storied Dish


Spaghetti alla Putanesca, a deliciously savory dish of alleged ill repute, reportedly emerged from the war-ravaged brothels of Naples in the late 1940s. The name means spaghetti in the style of, well, ladies of negotiable virtue. The dish can be prepared quickly, for example in the short time between clients. It needs only non-refrigerated ingredients, as might have been found in your typical disorderly Neapolitan brothel kitchen’s pantry – spaghetti, canned tomatoes, garlic, olive oil, anchovies, olives, capers, dry hot pepper. The illicit-sounding dish became popular by the 1950s. Its catchy title inevitably brought out nudge-nudge, wink-wink attempts at wit: “fast,” “easy,” “hot.”


Unfortunately, food historians (and they exist!) have focused on a flamboyant cook and nightclub host on the nearby island of Ischia, not Naples working girls, as the likely creator. Yet, the lingering name suited the Italian sense of culinary humor.


To make Spaghetti alla Putanesca, the trick -- a risky word here -- is having the sauce ready before boiling the pasta. Cheese is not traditionally used. Dry to off-dry white wines, not red wines, are recommended for pairing because of the anchovies and hot peppers.


The recipe serves six as a starter course, Italian style, or four as the main course.

4 large cloves garlic, minced
1 (2-ounce) can anchovy fillets (save oil), coarsely chopped
24 Greek Kalamata olives, pitted and chopped
2 tablespoons capers, drained
2 tablespoons chopped parsley
6 tablespoons combined oil from anchovies plus olive oil as needed
1/2 teaspoon crushed red pepper flakes
1 (14-ounce) can diced tomatoes
Salt, if needed
3/4 pound (12 ounces) spaghetti

Boil large pot of water for the pasta, and prepare the ingredients.

In large frying pan gently fry garlic in the oil 10 seconds, stirring. Add anchovies and hot pepper. Fry 1/2 minute. Add tomatoes, olives, and capers. Raise heat and boil, stirring, 2 minutes. Taste, and add salt if needed. Remove from heat. Stir in parsley.

Add 1 tablespoon salt to the boiling water. Add pasta, stirring immediately so it doesn’t stick together. As pasta softens, bite a piece to test. When just tender, drain in colander, but do not rinse. In large serving bowl, toss pasta with 3/4 of the sauce. Spoon remainder of the sauce on top.

,


Chopped Egg Canapé, a Classy but Affordable Appetizer


This dish, which is really just a fancy egg salad, draws on the flavors in tangy Devilled Eggs, but is easier to make. It goes with crackers, baguette bread slices, or wedges of pita bread.


8 eggs, hard boiled

4 tablespoons each, finely minced red and green bell peppers (part for garnish)

2 teaspoons finely minced green onion (green and white part)

4 tablespoons mayonnaise

2 teaspoons Dijon mustard

2 teaspoons vinegar

2 teaspoons prepared horseradish

1 teaspoon sugar

1/2 teaspoon salt, plus to taste

1/4 teaspoon ground black pepper

Pinch of cayenne

Paprika for garnish


Shell and rinse hard-boiled eggs. Break them up thoroughly in a bowl with a fork. Add half each of the red and green minced bell peppers (reserving the rest). Mix in all the other ingredients. Taste for salt and other seasonings. Add a little of whatever seems low. Chill, covered until ready to serve.


Place in serving dish or on a platter. Sprinkle with a little paprika plus the reserved minced red and green bell pepper.


Serve with crackers, Melba toast, thinly sliced baguette, or vegetable crudités.

,


Poulet Chasseur -- French “Hunter-Style” Chicken


Over the centuries, chefs have given their creations fanciful names to suggest the exotic, or occasionally the humorous, and to entice the jaded palate. The created dish may not actually have been linked with its evocative name, merely arguable that it could have been. Hunters and hunting have often been invoked in cooking when game or the arrival of colder weather gave the excuse for a sort of Woods-to-Table cuisine.

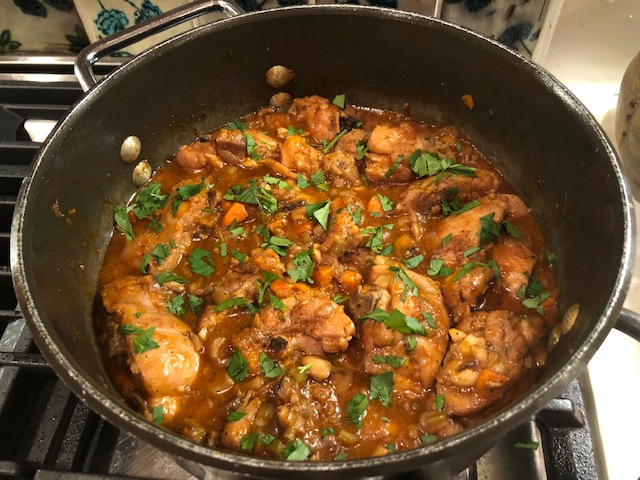
French “Poulet sauté Chasseur,” chicken cooked hunter’s style, is hearty and delightful.. The stew inevitably includes mushrooms, which the hunter, having bagged his kill, would thoughtfully have gathered from the forest floor, plus tarragon and other fresh herbs that he picked along the path home. It’s unclear where our hunter found his cooking wine or tomato. But, hey, it’s French. Don’t push it.


Despite its fanciful name and dubious story, this classical French dish is delicious. Serve it with scalloped or au gratin potatoes or with buttered noodles. Add crusty bread, a simple green salad and a light-bodied red wine.


The recipe serves six.


4 pounds chicken thighs with skin and bones (or 2 pounds boneless, skinless thigh)
2 tablespoons flour (or 1-1/2 teaspoons cornstarch, if avoiding gluten)

Salt and pepper for seasoning the chicken

1 large carrot
1 large stick celery
1 medium onion
3/4 pound mushrooms, preferably “Baby Bellas”
2 medium-large cloves garlic
3 tablespoons rendered chicken fat or olive oil
1/2 cup red wine
1 cup chicken broth, low salt

1/2 teaspoon salt, plus more to taste

1/8 teaspoon black pepper

1 large bay leaf
3-inch piece of fresh rosemary or 1/2 teaspoon dried
2 tablespoon tomato paste (freeze the rest)

1 tablespoons finely chopped tarragon or parsley for finishing

For whole thighs, remove skin and excess fat. (Render the fat and skin if desired for cooking grease.) Cut thighs in half, through the bone, with a cleaver or heavy knife. If using boneless skinless thighs, cut them in half. Generously salt and pepper chicken pieces on both sides, then dust them with flour or cornstarch. Set aside. 


Dice peeled carrot, celery, onion, and mushrooms into 1/4-inch dice. (Alternatively, coarsely chop, separately, in a food processor.) Crush, peel, and mince garlic.


In a large Dutch oven or casserole, heat the rendered chicken fat or olive oil to medium high. Fry part of the chicken at a time, frying on both sides until golden, and remove to a bowl.


When chicken is fried, add a little more oil to the pan if necessary, and fry carrot, celery, onion, mushrooms and garlic, scraping bottom of pan frequently. When vegetables are softened and just beginning to brown, Stir in the wine and cook it down slightly. Then add chicken broth and bring to a boil. Add 1/2 teaspoon of salt, the pepper, bay leaf, rosemary and tomato paste and “fry” 1/2 minute, stirring.


Add previously fried chicken and any juices. Stir to moisten, then simmer covered, stirring and scraping the bottom of the pan occasionally, until chicken is tender, 15 to 20 minutes. Add a little water if sauce becomes too dry. Taste sauce and add salt as needed.

Serve now, or cool, refrigerate, and reheat later. Just before serving, check salt, and add a little if needed. Stir in most of the tarragon or parsley.. Dust the remainder of the fresh herb on top.

,


Strawberry Sangria for Casual Entertaining


Despite its ominous name, meaning “bleeding” in Spanish, the Iberian wine punch “Sangría” is a cheery, even gentle, drink in warm weather. The congenially sanguine concoction typically features red wine, fruit and ice and is sometimes spiked with brandy or vodka.


Although the drink’s history is unclear, sangria appears to go back centuries as a simple mixture of wine with fruit in Spain and Portugal. Much earlier, combining wine with water and sometimes adding lemon or other fruit was a custom in Roman times. And Spain – then Hispania – was one of the Roman Empire’s major wine-producing regions. But wine was discouraged during the multi-century Moorish period in Medieval Spain, so there would not have been continuity with whatever Roman wine customs might previously have prevailed.


In any event, by the 20th century sangria was well established in Spain. Still, the drink was relatively unknown in the US until its introduction in 1964 at the Spanish Pavilion at the New York World’s Fair. Then for a few decades its American popularity soared. Sangria makes a delightful, classy, and relatively inexpensive drink for adult entertaining in warm weather.


Strawberries produce a luscious sangria. Citrus juice adds balance, and when that citrus includes grapefruit it adds a subtle, complex bitterness as well. I enjoy herbal overtones in sangria. Fresh mint, generally available here in warmer weather, does well, as does fresh rosemary, a perennial in Athens.


The traditional sangria wine in Spain is red and made from the Tempranillo grape, most classically from the Rioja region. However, to complement the delicate flavor of strawberries I would use a combination of red and white wines. American bars, by the way, tend to use whatever’s left in already-opened bottles to make their “Sangria Special.” Young, inexpensive -- but drinkable – wines, I think, are the way to go, like uncomplicated wines from Spain, Chile, or Australia. A fine wine’s subtleties are masked by the added fruit, herbs and sweetening. Save the good stuff for drinking on its own. Or, better yet, send it to me.


The recipe makes about 12 (6-ounce) servings, good for a party. A small glass punch bowl or a large glass pitcher present sangria well.


Strawberry Sangria

1 (750 ml) bottle fruity red wine, such as Tempranillo or Merlot, chilled

1 (750 ml) bottle white wine, such as Sauvignon Blanc or (unoaked) Chardonnay, chilled

1/4 cup brandy or vodka, optional

2 tablespoons frozen grapefruit juice concentrate (or orange)

3 tablespoons honey

6 (5-inch) sprigs fresh mint, rinsed, or 2 (3-inch) sprigs fresh rosemary, rinsed – or both

1 small navel orange, organic preferred

1 pound strawberries, organic preferred

3 cups ice cubes

Fresh mint leaves for garnish


In a large bowl combine the wines, distilled alcohol if used, grapefruit juice concentrate and honey. Stir to dissolve. Add the fresh herbs. Scrub orange but do not peel. Slice crosswise 1/4-inch thick. Reserve 4 middle slices for garnish. Add the rest to wine mixture. Rinse and hull strawberries. Slice lengthwise 1/4-inch thick. Reserve a third of them for garnish and add remainder to the wine mixture.


Allow the sangria to mellow for at least half an hour, or up to all day, refrigerated, stirring from time to time. Taste, and add a little more honey or grapefruit juice if needed for balance. Shortly before serving, strain the mixture into a small punch bowl or a large pitcher. Add the ice cubes and reserved fruit, cutting the orange slices in half.


Serve in wine glasses or small tumblers, putting several pieces of strawberry in each glass. Garnish the glass with a fresh mint leaf.


¡Salud!

,


Pork Tenderloin Braised in French Basque Style


Pork tenderloin has frequently been a bargain recent
ly at the supermarkets, and it’s always fairly cheap at the big-box stores. It’s one of my favorite meats to cook with, easily trimmed of fatty or fibrous bits, is highly versatle, and cooks quickly. Great for herb rubbing and roasting, frying, grilling, for kebabs and stir-frying, it can also be braised and stewed in a very short time. Here’s a quickly made provincial French pork and vegetable stew.


This colorful, dish with pork tenderloin is surprisingly easy to make. It fits with my recall of a dinner I had many decades ago at a Basque restaurant in Paris, far from the Basque Country of southwest France. The cooking shows influences from nearby Spain. I can’t recall what starch was served with it, most likely a rice dish, or possibly just baguette. There would certainly have been a southern French red wine to go with it. The reds from the Basque Country and nearby areas of Gascony are made from multiple grape varieties, are hearty and drinkable more than distinguished, and are hard to find in the US. My choice for a reasonable, and available, substitute with this dish would be a Spanish Garnacha or a red Côtes du Rhône.  


I’ve made the dish gluten-free, relying on the vegetables to thicken the sauce, though I don’t really know if any flour would actually be used in cooking this in France. And I did not use olives in it, which I sort of recall were present. The flavors are already rich and complex.. 


The recipe serves six. Accompany with a rice dish or warm crusty bread or dinner rolls. And as always with French food, a green salad goes well.


1-1/2 pounds pork tenderloin (they’re usually 2 to a package, use any extra for something else)

1 thick or 2 thin slices cured or smoked bacon, raw

1 tablespoon olive oil

1 medium-large red bell pepper, cored and cut in 1/4-inch squares

1 medium-large green bell pepper, cored and cut in 1/4-inch squares

1 medium onion, coarsley chopped

5 cloves garlic, minced

1 teaspoon salt for seasoning pork plus 1/2 teaspoon later

1/4 cup red wine

1 (14-ounce) can diced tomatoes

4-inch sprig fresh rosemary, or 3/4 teaspoon dry oregano

2-inch sprig fresh marjoram, if available, or 2 bay leaves

1/2 teaspoon ground black pepper

Large pinch of cayenne


Trim off  “silverskin” or other tough or fatty parts from the pork. Cut meat into 1-1/2-inch lengths.If the pieces are very wide, cut them in half.  Set aside.


On cutting board, thinly slice then chop the raw bacon and place it in a heavy pot with the olive oil. Cut the peppers, onion, and garlic as indicated. Combine them and set aside..


Heat the pot with the bacon and olive oil and fry them, scraping the bottom of the pot frequently, until bacon starts to turn golden. Add the pork and sprinkle all over with 1 teaspoon salt. Stir frequently and scrape the bottom of the pot, until pork has lost its raw color.


Add the vegetables, stir, cover the pot and simmer over medium heat, stirring frequently, 5 minutes. Add the wine, stir and let cook, uncovered, for one minute.


Add tomatoes, 1/2 teaspoon additional salt, the herbs, pepper and cayenne. Simmer, covered but stirring frequently, until meat is tender, about 10 minutes (cut off a little corner and bite into it as a test). Remove from heat and taste some sauce and vegetable for salt. Add a little if needed. Remove any whole herbs.


Can be served now, or cooled, refrigerated, and reheated later. Serve with a rice dish and/or warm crusty bread or rolls.

,


 Spareribs Braised with Sauerkraut and Cabbage, an Old-Fashioned Dish


At Kroger the other day, as I was seeking an idea for dinner -- and meat bargains to prepare it with -- I found pork spareribs on special. It’s a little past the season for BBQ ribs on the grill, which is probably why ribs were marked down. But it brought to mind a dish from my childhood. I picked up a meaty rack of ribs, a jar of sauerkraut. a small cabbage, and some red creamer potatoes.


I grew up in Southern New England in a family with Irish and Italian ancestry. We didn’t cook anything like this. I learned this“foreign” dish from our neighbors, whose kids were my best friends. They were of fairly recent German and Polish background and had moved to our town from central New York State. Pork ribs braised with sauerkraut and cabbage is substantial Central European fare, and in New York State and Pennsylvania and Ohio it was part of old-fashioned German-American cuisine. I was a little nostalgic as I prepared, then enjoyed, this recalled dish from many decades ago.


The recipe will serve four to six people heartily. The side to accompany the braised ribs can be small potatoes boiled or, nowadays, quickly roasted in a microwave. Or it can be buttered noodles, like Spätzle (available at Aldi and Trader Joe’s) or narrow flat egg noodles. This meal, to me, calls for a cold, dry Riesling or Grüner Veltliner or, as would have been more common back when I first learned of the dish, a Lager or Pilsner beer.


1 large rack of meaty pork spare ribs, about 3 pounds

1 teaspoon salt for the ribs plus more later

A little oil, as needed

1 small onion, finely chopped

1 Granny Smith type apple, peeled, cored and chopped

1 teaspoon ground black pepper

Aromatic whole spices, such as 10 juniper berries or allspice berries

1/4 teaspoon celery seeds, dill seeds, or caraway seeds

2 whole cloves

1 (14-ounce) jar or can of sauerkraut, juice partially squeezed out

1 cup water, plus more as needed

2 tablespoons brown sugar

1/2 of a small cabbage, cored and coarsely shredded


On a cutting board, using a chef’s knife cut the spareribs between the bones into individual riblets. Sprinkle the ribs all over with 1 teaspoon salt. Heat a large pot to medium hot. Fry the ribs in their own fat, or add a little oil if ribs are very lean, stirring frequently with a spatula and tongs, and turning the ribs often to brown them on all sides. Add the onion and apple plus the pepper and whole spices and cover the pot. Continue to fry over mediun-low heat, stirring often, until the onion is lightly browned.


Add the partially drained sauerkraut and a cup of water and simmer, covered, but stirring occasionally, for 20 minutes. Add a little water as needed to keep the mixture juicy. After 20 minutes, add 1 more teaspoon salt and the sugar, plus water as needed. Continue to cook until the rib meat is tender, another 10-15 minutes. Add the cabbage, stir it in and continue to simmer, covered, stirring occasionally, and adding a little water as needed, until the cabbage is tender. Remove the whole spices as you see them. Taste and add a little salt if necessary.


Once the cabbage is cooked, the dish can be served, or cooled and reheated later. Serve with boiled or microwaved small potatoes or buttered egg noodles.

,


Spicy Roasted Chicken Wings


While experimenting with some new seasoning mixes that I’m developing at the restaurant, I marinated and roasted chicken wings, as well as other meats and tofu, to test several of the mixes. The outcome was positive according to the kitchen staff and, subsequently, my grand kids. Better yet, in the course of those trials I came up with a simple non-fry way of preparing chicken wings as snacks.


Here is the method, using easily obtained seasonings.


The recipe uses two pounds of chicken wings, which will feed 4-6 people as a substantial snack. They should be eaten warm, soon after roasting or reheated briefly in a toaster oven. Provide napkins!


A good, easy dipping sauce can be found on this blog, posted 7/6/2020. A Louisiana type of hot sauce works too.


2 pounds chicken wings, thawed if frozen

1 teaspoon salt

1 teaspoon paprika

1/4 teaspoon garlic salt

1/4 teaspoon celery salt (or 1/4 tsp salt plus a pinch of ground celery seed)

1/4 teaspoon black pepper

1/4 teaspoon cayenne

1 teaspoon vinegar or lemon juice


With chef’s knife, cut each wing at the joints to produce three pieces. Place the meaty pieces in a bowl. (Cook the wing tips in water for half an hour for chicken broth for another use.)


Mix the dry seasonings and toss with the wings to coat them evenly. Add the vinegar or lemon juice and mix well again. After ten minutes, mix again. Cover bowl, or transfer wings to a zip lock plastic bag. Refrigerate at least six hours, mixing occasionally or if wings are in plastic bag squeezed to mix.


Heat oven to 375 degrees. Lightly oil a baking (cookie) sheet and distribute wing pieces so they do not touch each other.


Roast on top shelf of the oven for ten minutes. Turn the pieces over with tongs (plus spatula if stuck to the pan). Roast another ten minutes, and turn the wing pieces again. Roast another ten minutes and turn wings once more. After a final five minutes of roasting (35 minutes total) the wings should be well cooked.


Serve hot on a platter. If desired, provide hot pepper sauce or a dip such as the one posted in this recipe blog on 7/6/20.

,


Indian Dal, which doubles as Spicy Lentil Soup


Essential in an Indian or Pakistani dinner, simmered spicy “lentil” dishes, collectively called “dal,” are the base of meals throughout the Indian subcontinent. I put “lentil” in quotes because dal includes many different dry legumes, from lentils with or without their hulls, to various beans, to dried peas and split chickpeas. Rich in protein, fiber and nutrients, the various dals, or “pulses,” are ubiquitous in South Asian cooking, and eaten daily. For populations that are predominantly vegetarian for religious or economic reasons, dal provides the main regular source of protein, iron, certain vitamins, and dietary fiber. Throughout South Asia, dal is typically eaten with either rice or whole-wheat flat bread called “roti” or “chapati.”


Dal served with Basmati Rice
Aside from the economic and nutritional importance of the various dals, they can be prepared into stunningly tasty dishes. I had the good fortune when we lived in Malaysia to learn to cook dal from an Indian Sikh lady, Mrs. Majumdar Singh, who made her dal in the Punjabi style with “channa dal” (split, hulled small chickpeas). But most of the Indians in Malaysia were from South India, so I also learned the Tamil “rasam” and “parapu,” and the Malayalee “dalcha,” which used other dry legumes, from moong beans to black lentils to “toor” dal, and different seasonings. Some of these were cooked with vegetables, like eggplant, green beans, and “drumsticks.” In my own dal cooking both for home dining and for sale at the restaurant I use basically Mrs. Majumdar Singh’s method for channa dal but more often now use “masoor” dal, which are hulled and split red lentils. They cook more quickly and can be absolutely delicious.


Here’s the simplified way I now cook dal. Occasionally I use other legumes, like channa dal or split, hulled moong dal, or I add vegetables like spinach or green beans or zucchini (as a substitute for Asian gourds). But mostly it’s just the dal. Also I cook the spices, onion and butter (the traditional clarified butter – ghee – is harder to find) into the simmering dal rather than use the more complicated “tadka” method of frying the spices, onions and dried chilies in ghee and stirring it all in at the end.


As it turns out, dal, especially when made from split red lentils (masoor), also makes a delightful soup for Western-style dining, if diluted with a little water to the desired thickness. It’s like a vegetarian split pea soup, though more assertive with spice and character.


Masoor dal, split and hulled red (or “Egyptian”) lentils, are available inexpensively at supermarkets, Indian stores, and natural food stores. The spices are relatively readily available at the same places.


The recipe makes a little over a quart, enough for six people as part of a curry dinner, or four hearty bowls of soup for a Western-style lunch or supper.


1 1/2 cup red lentils

5 cups water

3 tablespoons butter (or vegetable oil for a vegan dish)

1 small onion finely chopped

1 1/2 teaspoons turmeric

1 1/4 teaspoons whole cumin seeds (or ground as a second choice)

1/2 teaspoon whole coriander seeds (or ground as a second choice)

1/2 teaspoon crushed dry red pepper or cayenne

1 teaspoon salt, plus more to taste

Coarsely chopped cilantro for garnish


Rinse and drain the lentils. Place in a pot with the water. Bring to a boil, stirring occasionally. Skim off and discard the foam that arises as the lentils boil.


Add the butter, onion and spices (not the salt), and simmer over low heat, stirring occasionally and scraping the bottom of the pot, until lentils are tender and start to disintegrate, 25-30 minutes. If the mixture is getting somewhat dry, add a little water.
Add the salt and simmer a few more minutes.


Remove from the heat, taste for salt and add a little if needed. Let cool.


Reheat to serve. Top lightly with coarsely chopped cilantro leaves when using as part of an Indian meal with rice or chapati.


If served as a soup in the Western manner, the cilantro is optional.

Follow Us @donderoskitchen