,


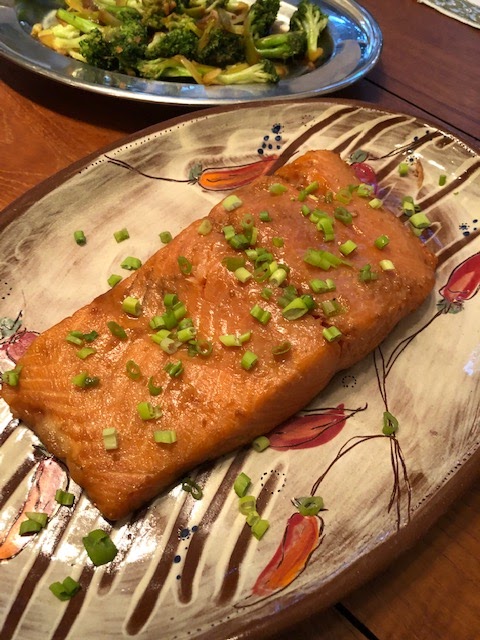
Teriyaki Salmon -- with Gluten-Free Option


Teriyaki, a traditional Japanese cooking method primarily used for fish, literally means shiny and grilled or broiled. In other Asian countries, similar methods, though with other names, are also used and are applied to chicken and pork in addition to fish.


Here’s the way I have been making teriyaki, primarily with salmon and roasting it in the oven, for some years at our restaurant. We’ve prepared it mostly for catering, using one or more whole salmon fillets, which makes an attractive party dish. (The same marinade can be used for boneless, skinless chicken thighs, which can be cooked on the grill or griddle.)


Soy sauce is essential for the teriyaki seasoning. A Japanese soy (such as Kikkoman, which is readily available in the US) or Korean soy have the appropriate flavor. Most soy sauces include wheat, and therefore gluten, in their fermentation process. People who must avoid gluten can get a gluten-free equivalent sauce, such as a Japanese “tamari,” which also gives the right flavor.


The recipe serves four, accompanied by rice and a stir-fried vegetable. The fish can be served hot for dinner, or at room temperature as part of an appetizer buffet.


1 pound piece of salmon fillet

2 tablespoons soy sauce, preferably Japanese or Korean, or gluten-free tamari

1-1/2 teaspoons sweet rice wine or “Mirin” (substitute is dry Sherry)

1 teaspoon rice vinegar or white vinegar

1 tablespoon sugar

1/2 teaspoon cornstarch

3/8 teaspoon salt

3/4 teaspoon grated fresh ginger

1/4 teaspoon Asian sesame oil

1 teaspoon canola or sunflower oil

Some thinly sliced green onion tops or chives for garnish


Wipe the salmon piece with paper towel. If the salmon still has skin on it, remove it by placing the salmon skin side down on a cutting board and with a sharp knife cutting a quarter inch into one end of the fish between the skin and the flesh. Then holding the skin down with your fingertips, slice along the skin to free the flesh from the skin.


Combine the remaining ingredients, aside from the green onion or chives for the garnish, and stir well. Marinate the fish in a flat-bottomed container for several hours, occasionally lifting the fish a little to get marinade under it and spooning marinade over the top.


Heat the oven to 375 degrees. Place the salmon on a baking sheet. Drizzle a little of the marinade over the salmon and discard remaining marinade. Roast 14 minutes on an upper rack. If the surface is looking cooked, test by sticking the tip of a small sharp knife into the fish with the “grain” and twist the knife gently to see if the raw color is almost gone. If not, roast another 2 minutes and test again. Do not overcook.


Teriyaki salmon can be eaten hot or cold. Platter the fish and sprinkle lightly with sliced green onion top or chives.


,


Louisiana Red Beans and Rice


A Louisiana Creole family favorite, Red Beans and Rice feeds a hungry crowd for Sunday dinner, with really tasty food and at a modest cost. The beans are generally not red kidney beans, but rather the smaller red beans, which are also used in some Caribbean countries as well as in Louisiana. The meat in this dish is typically Andouille sausage, made with pork and hot peppers and often smoked.


I’m making it more easily than the original, since I use canned red beans, rather than soaking and boiling dry beans from scratch, plus I’m using commercially available Cajun Seasoning – which contains salt. (I use Louisiana Brand, but Chacheré’s Creole is also good.) This blog has a number of readers in other countries and, unfortunately, this particular regional American dish may not be one you can easily get key ingredients for. But if you ever visit Louisiana, try it there!


The recipe serves six as a dinner dish on top of white rice, traditionally medium-grained rice from Louisiana or Arkansas. I like jasmine rice, which is more available and which we cook with a lot. Brown rice will also work. (See elsewhere in this blog – check the index – for rice cooking notes.) Offer a Louisiana-style hot sauce for diners to add to their food if they wish, like Crystal, Louisiana Brand, Tabasco, “Frank’s RedHot,” or Texas Pete,


1 medium-large green or red bell pepper, cut in 1/4-inch dice

1 large stick celery, split lengthwise several times, then cut crosswise 1/4-inch wide

1 medium-large, cut in 1/4-inch dice

2 tablespoons olive oil

1 (14-ounce) Andouille sausage, split lengthwise then cut in 1/4-inch lengths

1 large clove garlic, minced

1 (14-ounce) can diced or crushed tomatoes

1 tablespoon Cajun seasonings

2 (14-ounce) cans red beans (not red kidney beans), drained but not rinsed

Salt if needed

Green onion tops thinly sliced for garnish

Hot unsalted cooked white rice, either medium-grained or jasmine. for serving


In a heavy pot, gently fry the cut up bell pepper, celery, and onion in the oil, stirring frequently, until vegetables soften, about 10 minutes.


Add the cut Andouille sausage and garlic, and fry, stirring frequently, another 10 minutes.


Add the tomatoes, including any juice, plus the Cajun Seasoning. Simmer another 10 minutes. Finally add the drained red beans and simmer, stirring occasionally, another 15 minutes. Taste, and if the salt is not sufficient, add a little as needed.


Serve hot over hot unsalted white rice in shallow soup bowls. Top with a sprinkling of thinly sliced green onion tops. Pass the Louisiana-style hot sauce for diners to add to their taste.

,

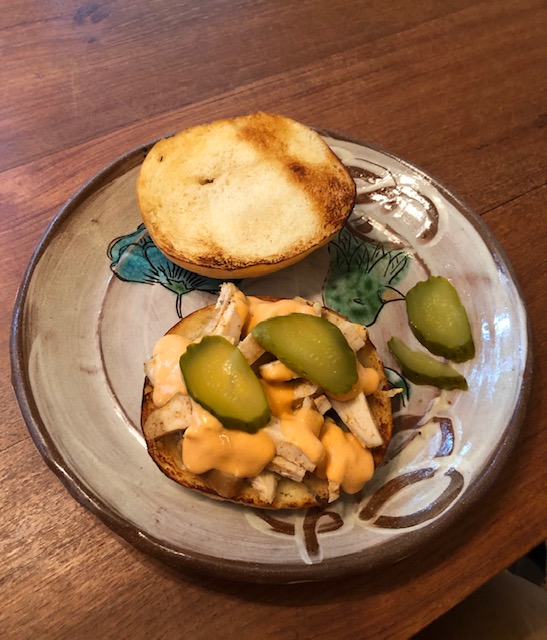
 Spicy Chicken Sandwiches – For My Grandsons


On multiple occasions when I’ve driven my grandson Thomas from his baseball games, and he needed something to eat, the request was always a spicy chicken sandwich from a fast-food place. He has his favorites, but finds most of the places make satisfying sandwiches. It turns out the other two chicken-eating grandsons, Matty and Roscoe, also love spicy chicken sandwiches. But they have different favorite restaurants.


Therefore I tried to come up with a home-made spicy chicken sandwich, along with its sauce, to serve at home for the three cousins. I wanted one with no breading, no batter, to cut down on the grease that the commercial ones have. The boys, as well as several of their sisters, liked the result. Here it is.


The recipe makes six sandwiches, each a sizable serving. The chicken can be fixed ahead, as can the sauce, then the sandwiches assembled as needed.


The Chicken:

2 large boneless, skinless, chicken breast halves (1-1/4 to 1-1/2 pounds)

1/2 teaspoon salt

1 teaspoon paprika

1/4 teaspoon celery salt

1/4 teaspoon garlic salt

1/4 teaspoon cayenne

1/4 teaspoon black pepper

2 teaspoons olive or other vegetable oil


Trim off excess fat and any tough parts from the chicken breasts. Place them on a baking sheet. In a small bowl, mix the salt and other dry seasonings, and sprinkle the mixture evenly all over the breasts. With hands, rub the seasonings into the chicken. Drizzle with the oil, and rub that all over the chicken as well. Allow to season for at least half an hour.


Heat oven to 350 degrees. Bake chicken 10 minutes, then turn the pieces over with tongs. Bake another 10 minutes. Turn once more and bake another 5-10 minutes, or until browned and the meat feels firm to the touch. Ideally use a meat thermometer and check that the chicken measures at least 165 degrees internally. If no thermometer, cut a breast piece across in the middle to be sure there is no pink uncooked area in the middle. If not done, bake another 5 minutes and test again for doneness. When done, let the chicken cool. Store refrigerated until needed for the sandwiches.


Spicy Sauce:

4 tablespoons sour cream

2 tablespoons mayonnaise

2 tablespoons tomato ketchup

2 tablespoons Siracha sauce

2 tablespoons hot sauce such as “Frank’s RedHot” or “Texas Pete”


Mix all together until smooth. Store refrigerated until needed,


Making the Sandwiches:

6 large burger rolls, Kaiser rolls, or potato rolls, etc.

Butter for the rolls

Thin pickle slices, if desired


Cut the baked, cooled chicken pieces lengthwise down the middle. Then turn the pieces onto their cut surfaces, and with the knife cut lengthwise down the middle to split them into two thinner pieces. Finally, slice the chicken pieces across into 1/4-inch wide shred-like pieces. Taste a piece, and if it seems under-salted, sprinkle the cut chicken lightly with salt, and mix it all together. Place chicken pieces in a microwaveable casserole dish with a lid and heat, covered, in the microwave for 3 minutes. With a spoon, mix the pieces, and if they’re not hot, microwave them about another 3 minutes.


Cut the rolls into two halves, like a hamburger bun. Smear the cut surfaces very lightly with butter. Fry the rolls on their cut surfaces on a heated griddle until lightly browned.


Spoon the cut, heated chicken onto the bottom halves of the rolls. Spoon about two tablespoons of the spicy sauce per sandwich over top.
,

 Tarte de Cambrai -- Easy French "Cake" with Fresh Fruit


Tarte de Cambrai, also known as Tarte Normande, is a easily made cake-like dessert with fresh fruit baked into the top. The original was made with apples, the major fruit of Normandy, in the northwest of France, where this dessert is a traditional specialty. Pears are also used, as are fresh plums, which are my favorite. Sometimes the apple version, reportedly, contains some Calvados, the apple brandy of Normandy. 


In our house, this tarte has become a standard dessert that my wife, Christina, makes. having found a recipe in a cooking magazine 40 years or more ago, possible "Cuisine." Depending on what fruit is in season, she makes the treat with any of the three typical fruits. Right now with prune plums in season she just used those, as pictured in this posting.


The traditional topping in France is Crème Fraiche, the French version of sour cream. Sour cream or whipped cream, or even a little vanilla ice cream can be used here when serving the tarte. 


The recipe makes a 10-inch round cake, enough to serve six to eight for dessert or tea snack. 


5 large ripe apples or pears, or 10-12 medium-small dark-colored plums

1 tablespoon lemon juice for the fruit 

Batter:

10 tablespoons (1/2 cup plus 2 tablespoons) flour

6 tablespoons sugar

1 teaspoon baking powder

1/4 teaspoon salt (the French use less)

1/4 cup vegetable oil

1/2 cup milk

2 eggs

1 teaspoon vanilla

Topping:

2 tablespoons sliced almonds (optional)

2 tablespoons sugar

1/4 cup (1/2 stick) butter


Set oven for 375 degrees.


Peel apples or pears, if used. Quarter them and cut out the cores. Cut the fruit lengthwise into 1/4-inch wide wedge-like slices. Toss them with the lemon juice. Or, if using plums, rinse them but do not peel. Cut them in half around the pit, twist them to free up the pit, or cut along it with a knife to remove it. Keep the plum halves intact if they are small, or cut them in half if large. Toss them with the lemon juice.


In a mixing bowl, place all the batter ingredients and mix them together well by hand using a whisk or large fork. 


Grease a 10-inch round baking dish that the tarte will be served from. Spread the batter evenly in the dish. Arrange the fruit attractively on top of the batter. If using sliced almonds, scatter them over the surface. Sprinkle the top evenly with the 2 tablespoons of sugar, then cut the butter into bits and scatter them evenly on top.  


Bake 40-50 minutes or until the tarte has risen and the top is golde
n brown. 


Eat warm with whipped cream, sour cream, or vanilla ice cream.


,


Cauliflower-Cheese Rissoles -- a little like Vegetarian Crab Cakes


Experimenting recently with ”Riced Cauliflower,” which has come into a certain vogue, particularly among vegetarians and gluten avoiders, I tried making a vegetarian “meatball” for my granddaughter Clara, who does not eat meat. In the course of those trials, I realized I can make something as useful as Riced Cauliflower, but much cheaper, as well as easier to source, from actual cauliflower. And I could then turn that into a baked cauliflower-cheese cake, or “rissole.” With a little sauce over it, that rissole makes a very nice appetizer, hot or at room temperature. Conceivably I could also make a larger cauliflower-cheese “burger” by shaping the cake differently and serve it on a toasted bun..


Here is the appetizer rissole version, small, somewhat flat, baked cakes. With a little sauce, like a rémoulade for example, the rissoles are suggestive of vegetarian crab cakes and make a very nice appetizer. For this demonstration, I used my current favorite rémoulade sauce, “Rose Sauce,” which I described in a separate blog post. I’m repeating the recipe here for convenience. Other cold sauces, or even a cocktail sauce, would also work with these rissoles.


It’s convenient to make these rissoles ahead of time, then serve them at room temperature, or quickly reheat them in the oven to serve them warm. Similarly, the sauce, which is very easy, should be made ahead.


The recipe, based on a small cauliflower, makes enough rissoles for appetizers for 4 to 6 people. To make a larger batch, use a medium-sized cauliflower and increase the other ingredients, except for the egg, by 50%. Or double the entire recipe.


The rissoles


1 small cauliflower (about 1-1/4 to 1-1/2 pounds, including leaves)

1 cup (lightly packed) grated cheddar cheese

1/2 cup dry unseasoned breadcrumbs, plus 2 extra tablespoons for finishing

1 teaspoon cornstarch

1/2 teaspoon salt

1/4 teaspoon ground black pepper

1/8 teaspoon nutmeg

A large pinch of cayenne

2 tablespoons olive oil

2 tablespoons water

2 teaspoons Dijon or brown mustard

1 egg, lightly beaten


Cut away the leaves from the cauliflower and cut cauliflower pieces and their stems off the main stalk. Place those on a microwaveable plate and cook in the microwave at full power for three minutes at a time up to a total of 12 minutes. Test for doneness by cutting off a little piece and biting into it. If it’s tender, cool the cauliflower. If still crunchy, roast another 3 minutes.


Put a third of the cooked cauliflower pieces on a cutting board and chop them finely with a chef’s knife. Transfer to a bowl, and do the same chopping twice more for the remaining cauliflower.


To the chopped cauliflower in the bowl, add all the remaining ingredients except the egg, and mix together well. Taste the mixture (before the egg is added), to be sure the salt is enough, since cauliflowers vary in size. Add a little salt if necessary. Beat the egg lightly in a bowl and combine it thoroughly into the cauliflower mixture. The mixture is somewhat sticky. It’s easier to handle if refrigerated for half an hour or more.


Set oven for 325 degrees. Grease or oil a baking sheet, such as a cookie pan. Put the extra 2 tablespoons of breadcrumbs on a small plate. With hands (rub them with a little oil to make the mixture stick to them less), make small cakes, all about the same size, of the cauliflower mixture and touch them on the breadcrumbs plus sprinkle them with a little more of the crumbs. Flatten cakes somewhat and place them on the greased pan.


Bake the cakes ten minutes in the preheated oven. Slide a thin metal spatula under them and turn them over. Bake another ten minutes, then turn the cakes again. Bake for a final ten minutes, or until they are looking a little golden.


Serve warm,or at room temperature, arranged on a platter, accompanied with a sauce for spooning over them. Or they can be refrigerated, then reheated briefly in the oven on a flat pan to serve hot.


Quick Rose Sauce (a Rémoulade)


3 tablespoons sour cream

2 tablespoons tomato ketchup

1 tablespoon mayonnaise

1 teaspoon prepared horseradish

A large pinch of salt


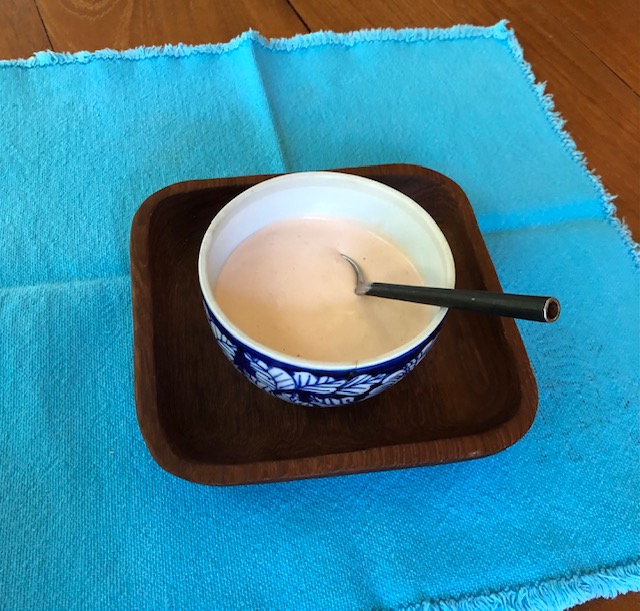
Mix all ingredients together well. Place in a decorative small bowl to serve with the cauliflower rissoles.


,

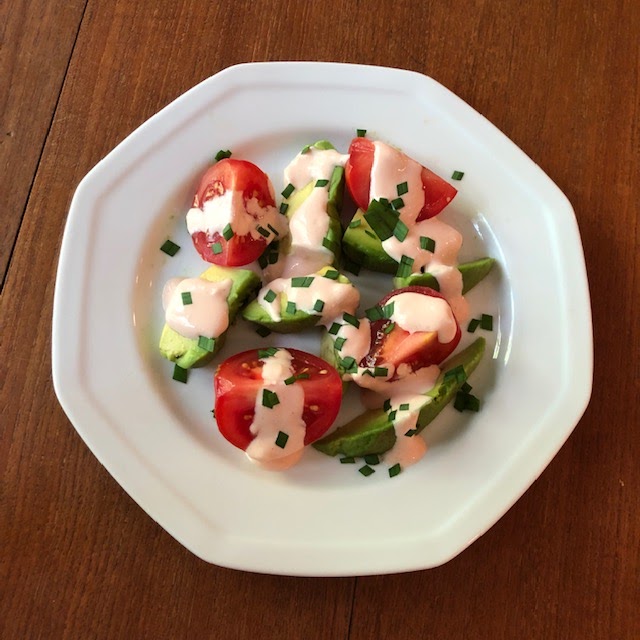
 Tomato and Avocado Appetizer "Salad"


Avocadoes make an easy and delicious appetizer course. As simple a dish as a halved avocado with  a simple salad dressing or just balsamic vinegar and salt starts a dinner well. But combined with fresh, sweet tomatoes and a fancier dressing. avocado can be quite elegant, yet very simple to prepare.


Here's an appetizer "salad" of avocado and tomato topped lightly with my favorite Rose Sauce and a bit of chive or shredded green onion top. I wrote a blog post just on the sauce, but here I'm applying it to enhance these delightful vegetables (which are technically both "fruits"). Since fresh local farm-raised tomatoes aren't readily available right now, I'm using the Campari tomatoes that are available at supermarkets year round, which are reliably sweet and beautifully dark red. They are specially developed hybrids (not GMO) for hydroponic and greenhouse production. I believe this same type of tomatoes are also marketed as "Cocktail" tomatoes, and come on the stems.


The recipe serves six, and should be made and served on individual appetizer plates.


3 ripe avocadoes

6 medium-small ripe tomatoes, preferably "Campari" or "Cocktail"

Finely cut chives or green onion top for garnish

Rose sauce

3 tablespoons sour cream

2 tablespoons tomato ketchup

1 tablespoon mayonnaise

1 teaspoon prepared horseradish

A large pinch of salt

Mix the sauce ingredients together well.


Cut avocadoes in half and remove the pits. Peel the avocado halves and cut each half into pieces on a separate appetizer plate. Cut a tomato into either four or six wedges, depending on size, and place them attractively among the avocado pieces on
a plate. Spoon about a tablespoon of rose sauce over the vegetable pieces on each plate. Sprinkle a small amount of cut chive or green onion top over the dressed plate, allowing a few to fall onto the plate outside the vegetables and sauce.

Serve as the appetizer course for your dinner.

,


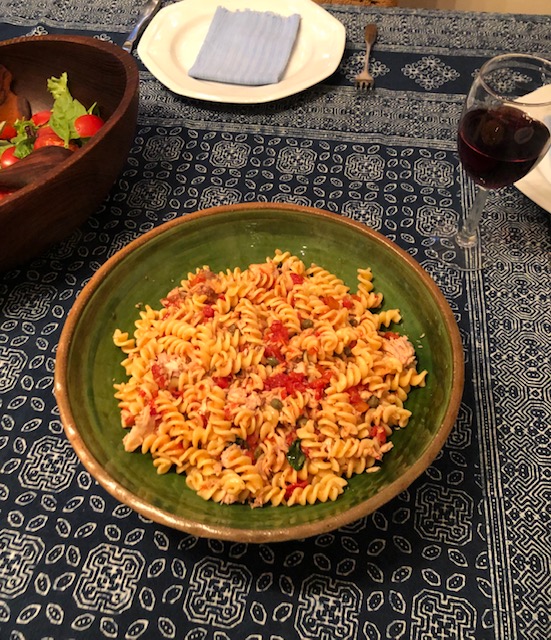
Pasta al Tonno, Pasta with Tuna and Tomato


In the United States, we are familiar with a limited number of pasta dishes. By contrast, in Italy, where pasta is ubiquitous, there are dozens if not hundreds of different, named, pasta dishes. Many of those are lighter, or simpler, than what we are used to. But in Italy, pasta typically serves as an early course in the dinner, or sometimes as a snack or light lunch, and not as the main dinner dish.


I first encountered pasta with tuna in Sicily, in Syracusa specifically. As I recall it was made with a “long” pasta, spaghetti or possibly linguine. But the dish can also be made with “short” pasta.


I’ve since learned that most of the tuna fishing by Italian fishermen is based out of coastal villages in Sicily. And while pasta with tuna and tomato is made elsewhere in Italy, it is a specialty in Sicily, particularly when made with fresh tuna. I’m pretty sure, though, that the pasta al tonno I first ate had canned tuna, as the dish typically does in Italy.


Here’s a delightful, fairly light, Pasta al Tonno, that can serve as part of a dinner, or as a light meal in its own right, accompanied by a simple salad. This dish is relatively quick and easy to make, but should be cooked shortly before eating.


In Italian cooking, pasta dishes that feature seafood, rather than meat or vegetables, rarely also contain cheese. Cheese makes a pasta dish heavy, and the point of seafood is lightness.


The best canned tuna for this dish is imported from Italy and is solid and packed in olive oil. At our local supermarket the closest I can get is Yellow Fin tuna canned in olive oil with the brand name “Genova.” which though not actually from Italy works satisfactorily for the dish.


The Italian trick of gently frying the garlic, somewhat crushed, in olive oil till golden then removing it keeps the floral essence of garlic without any of the bitterness or coarseness.


The recipe serves 6 people as the pasta course of a bigger dinner or as a light lunch or supper meal. In Italy, salad is served after the main course, but here we’d typically have the salad along with the pasta or dinner.


1 (4 to 5 ounce) can solid-meat tuna packed in oil, preferably olive oil

3 large cloves of garlic, peeled and partially crushed (with the bottom of a tumbler)

2 tablespoons capers, drained (optional)

1/4 teaspoon dry crushed red pepper flakes

1 (14-ounce) can petite diced tomatoes

1/2 teaspoon salt

6 medium-sized fresh basil leaves, or leaves from 4 sprigs flat (“Italian”) parsley

3 tablespoons olive oil

8 ounces (1/2 pound) spaghetti, or short pasta, such as Rotini or Ziti


Have all the ingredients ready, cans opened, etc. Keep the juices in the tuna can, since they are used in the recipe. Bring a large pot of water to a boil and add a teaspoon of salt, ready to boil the pasta.


Heat a heavy, shallow pan to medium-low, and gently fry the crushed garlic in the olive oil, stirring very frequently, until the garlic is golden colored. Lift garlic out of the pan, keeping the now-flavored oil in the pan. Add the drained capers, if used, and stir and fry about 10 seconds. Add the crushed dry pepper and stir and fry 5 seconds. Add the tomatoes and their juices to the pan. Press the lid of the tuna can gently into the tuna and add the juices to the pan. Stir and fry the tomatoes over medium heat a few minutes until the liquid is reduced somewhat. Stir in the salt and basil or parsley leaves and turn off the heat.


While the tomatoes are cooking, add the pasta to the boiling, salted water, and stir well for the first minute so the pasta doesn’t stick together. Then stir it less frequently. After 5 minutes or so, begin biting into a bit of the pasta to check for tenderness. When no crunch is present, and the pasta reaches the tenderness you want, drain it in a colander, catching some of the pasta water in a small bowl.


Put drained pasta into a bowl to mix, add the cooked tomato sauce. Using a fork, break up the tuna in its can and add it to the pasta. Toss this all together briefly. If the mixture is dry, add a little of the reserved pasta-boiling water to moisten it. Taste for salt, and if needed add a bit. Transfer mixed pasta to a serving bowl and serve immediately.


,


Rose Sauce, a Simple but Luscious Condiment


Rose (or Pink) Sauce is a sort of “rémoulade” that I developed based on several more traditional similar sauces. It works well as a condiment with vegetarian dishes, French fries, and crab cakes. (Elsewhere in this blog -- check the index -- the sauce is the topping for cauliflower-cheese rissoles.)


The sauce was influenced by “Salsa Rosa,” a Puerto Rican topping for fried ripe plantains. (That salsa couldn’t be easier to make: a mixture of mayonnaise and tomato ketchup.) Another influence was an originally French sauce we encountered in West Africa used both on cooked shrimp and on avocado. Finally, I couldn’t resist adding a little horseradish, which is a key flavor in the sauce used on American shrimp cocktail.


Here’s the recipe for a batch big enough to serve as the condiment for a meal for six. It will store, refrigerated, for a few days, but it’s quick enough to make fresh as needed.


3 tablespoons sour cream

2 tablespoons tomato ketchup

1 tablespoon mayonnaise

1 teaspoon prepared horseradish

A pinch of sea salt


In a small bowl, mix the five ingredients together well with a fork. Taste and add a tiny bit of salt if needed.


Place in a small dish to spoon onto whatever you’re serving it with.


,


Chicken and Biscuits, for my Grandson


Simple, down-home favorites, like chicken and biscuits, often to go over well with kids -- like my grand kids. The trick is to make the dish simple enough so they don’t get turned off (no unusual seasonings, no green bits in there), yet interesting enough to satisfy the adults eating with them.


Here’s my try at a simple-to-make “Chicken and Biscuits” for a recent dinner for a chicken-loving grandson, Roscoe, and his family. For convenience I used boneless, skinless chicken breast, commercially available buttermilk biscuits, and fresh broccoli (which my grandson likes) as our side vegetable and some color on the plate.


Suddenly, this is Roscoe’s third favorite meal that I cook, after Indian Butter Chicken with naan and Chinese stir-fried chicken with vegetable and rice.


The recipe serves six

.

2 medium-large boneless, skinless chicken breast halves (about 1-1/2 pounds)

1/2 teaspoon salt

1/2 teaspoon paprika

1/4 teaspoon ground black pepper

2 tablespoons olive oil

2 tablespoons butter

1 small clove garlic, put through a press or finely minced

6 tablespoons sour cream


6 large homemade biscuits, or 1 tube package of 10-12 refrigerated commercial biscuits, baked following directions, and served warm when the chicken is done.


Trim off any tough parts or excess fat from the chicken breasts. Sprinkle them on both sides with a mixture of the salt, paprika and black pepper. Let sit at least 10 minutes.


Heat a heavy frying pan to medium hot. Add olive oil and butter. As soon as they are hot, place the chicken breasts in the pan and cover it. After one minute, turn the chicken breasts with a metal spatula. Cover pan and cook another minute on the second side. Then, on medium low heat, continue to fry the chicken, with the cover on the pan, turning the chicken pieces every 2 minutes, until it they are dark golden and feel somewhat firm. Turn off heat and keep the pan covered another 20 minutes.


Remove the chicken pieces to a cutting board, keeping the pan juices. With sharp knife, slice the chicken across into 1/4-inch slices. Hold this chicken until ready to finish the dish.


Bake the biscuits just before starting to finish the chicken dish.


Reheat the pan used to fry the chicken, still containing the juices from the frying. Add the pressed or minced garlic and stir for 10 seconds. Add the sour cream, and stir until it comes to a bubble. Add the sliced, precooked chicken and heat quickly over high heat, stirring and turning the chicken pieces. If the sauce is dry, add a little water to make it soupier. Taste the sauce and add a little salt if needed.


Serve chicken and sauce on a plate near one large or 1-2 smaller biscuits. Accompany with a colorful vegetable, such as broccoli. 

,


Chicken Créole with Chayote


Chicken cooked in the “Creole” manner means many different things, from Louisiana, to Haiti (“Poulet á la Créole”), to cooking I encountered in Madagascar at a restaurant featuring food from the French Pacific island of Réunion. “Créole” (which has the counterpart terms “Criollo” in Spanish and “Crioulo” in Portuguese) originally indicated a person of European French ancestry who was born and raised in the colonies or overseas territories. The meaning of Creole has broadened over time to include other ancestries, but there was at least some French background. The term now applies to ethnicity, language, and particularly cooking.


Creole cooking in Louisiana shares influences with Spanish Caribbean and Haitian cooking. These include local meats, seafood, vegetables and spices.


Chayote Squash
The recipe below combines several influences I experienced in French-speaking tropical countries. Chicken is common, though usually cooked on the bone, unlike my easier version. And a wonderful vegetable in the squash family, most familiar to Americans  under its Spanish name “Chayote,” is frequent in areas with Creole cooking, including Louisiana and Haiti (where it’s called “Mirliton”) and elsewhere in the French-speaking Caribbean (called “Christophine”) and Jamaica (“Cho-Cho”). Chayote is available at Mexican and Latino grocery stores and some supermarkets.

In Louisiana and Haitian cuisine, a braised Creole chicken dish would be served with plain rice or with a seasoned rice dish. (There is a suitable “spiced rice” in this blog that can be found through the index.)


The recipe serves six, and should be accompanied by a rice dish.


1 1/2 pounds boneless, skinless chicken breast

1 tablespoon flour for the chicken

3/4 teaspoon salt plus 1/4 teaspoon black pepper for seasoning chicken

1 large chayote squash

1/2 of a large stick of celery, minced

3 large cloves garlic, minced

1 large jalapeño, including seeds, minced

1 poblano or green bell pepper, diced

1 medium onion, diced

3 tablespoons olive oil for frying, plus 2 more later

1 (14-ounce) can diced tomatoes plus 1/2 can of water

3 bay leaves

1 tablespoon paprika

1 teaspoon salt, plus more to taste

1/4 teaspoon thyme

1/4 teaspoon oregano

1/4 teaspoon ground black pepper

1/4 teaspoon ground cumin

1/4 teaspoon ground allspice


On a cutting board trim tough or fatty parts off the chicken. Cut the flesh into 1-inch pieces. Season with the flour, salt and pepper, and set aside.


Rinse the chayote, but do not peel it. Split it lengthwise, and scoop out the small seed. Cut flesh into 1-inch pieces and set aside.


Prepare the other vegetables, putting them in separate piles on a tray for easy access.

In a heavy pot, heat the olive oil. Add the chicken and fry it on high heat, scraping under it very frequently with a metal spatula. Cook till raw color is gone and chicken just begins to turn golden. Lift chicken out to a bowl. 


Add 2 more tablespoons oil to the pot then add minced celery, and stir and fry about 2 minutes. Add minced garlic and jalapeño and fry, stirring another 2 minutes. Add diced onion and poblano or bell pepper and fry several minutes, stirring frequently, until onion starts to soften.


Add canned tomatoes and water, plus the seasonings and salt. Bring to a boil, and simmer, stirring occasionally, until the pepper is becoming tender.


Add the cut chayote, and simmer 5 minutes, stirring occasionally. Add the pre-fried chicken and any juices. Bring back to a boil, and simmer 5 minutes. Test a piece of chayote to see if it has become tender. If not, simmer a little more. But do not overcook the chayote.


Turn off the heat. Stir well and taste for salt, adding a little if needed.


Serve now or, preferably, cool the dish and reheat later to serve. Taste for salt just before serving and adjust if needed. Accompany with a rice dish.


,


Chicken Gumbo with Zucchini for Summer 


My informant on matters New Orleanian, Katie, a Hurricane Katrina exile who worked at a fine Decatur restaurant that I frequented back when we lived in a nearby part of Atlanta, had no answer. I had asked what dish was special in summertime in New Orleans.


She asked her mother. She asked her relatives. She even asked her Ex. The response was “maybe a Sno-Ball?” In fact, if you could, you tried to escape “N’awlens” in midsummer, not languish there in the heat for seasonal savories. Mom-and-pop restaurants, where local people typically ate, often closed in mid-summer.


But with summer produce abundant in Georgia, a vegetable-rich chicken gumbo seems timely, at least for here. Adding rice, crusty bread and a light salad, this Louisiana perennial becomes a great summer meal. A chilled light-bodied red wine, like a Beaujolais, or dry rosé completes the treat.


Gumbo fuses several Louisiana cooking traditions. Although thought of as "French," the dish, in fact, most closely resembles stews from West Africa (we lived in Cameroon for several years). It even draws its name from a West African word for okra. No surprise. Recall for a moment who had to cook in old Louisiana, enslaved West Africans.


The seasoning, however, is predominantly Spanish-Caribbean. The flour-fat mixture cooked to a red-brown is a French dark "roux." And filé powder (ground dried sassafras leaf), if used instead of okra (I didn’t this time), is from Choctaw Indian tradition.


The roux is the heart of gumbo making, and the trickiest part. Flour and fat or oil are fried down slowly until richly brown. Here I use olive oil plus some freshly rendered bacon grease. And for lightness in summer, I use zucchini rather than the more traditional okra.


The recipe serves six, but leftovers are great.


2 strips smoked bacon, raw

3 tablespoons olive oil

1/4 cup flour

1 medium-large onion, coarsely chopped

1 large stick of celery, split lengthwise and cut 1/4-inch wide

1 large green bell pepper, cut in 1/4-inch squares

1 medium-large jalapeño pepper, including the seeds, diced

3 large cloves garlic, diced

1 (14-ounce) can diced tomatoes

1/2 can (above) chicken broth or water

1-1/2 teaspoons salt, plus more to taste

3 large bay leaves

1 tablespoon paprika

1/2 teaspoon black pepper

1/4 teaspoon thyme

1/4 teaspoon oregano

1/8 teaspoon ground allspice

1 to 1-1/2 pounds boneless, skinless chicken breast, cut in 1/2-inch pieces

1 small-medium zucchini, cut in 1/2-inch pieces

Cooked, unsalted rice for serving

The roux


In heavy pot over very low heat fry the bacon strips in the olive oil until starting to become golden. Remove the cooked bacon and chop it up on a cutting board and set aside for later in the recipe. Add flour to the grease in the pan to make the roux. Stir frequently over medium-low heat, scraping bottom of pan, as moisture boils off then mixture turns golden (10-15 minutes). Reduce heat and stir very frequently until the color is like caramel. Be careful not to scorch the roux.


Add the celery, onion, bell pepper, jalapeños and garlic. Fry about 10 minutes, stirring frequently and scraping the bottom of the pot, until the vegetables start to soften.


Add the reserved, cut-up bacon, the tomatoes and the broth or water, along with the seasonings. Simmer about 10 minutes, or until the vegetables, especially the celery, are becoming tender. The liquid will be a bit thick, but will become thinner when the later ingredients are added.


Add chicken, and simmer 5 minutes. Add the zucchini and simmer until it becomes tender, 8-10 minutes. Meanwhile, add salt, a little at a time, until it tastes balanced.


Let sit, with the heat off at least ten minutes for the flavors to mingle. Taste a final time and add salt, if needed. The gumbo can be served now, or for a more mellow flavor, let it cool and reheat it later to serve.


Serve in large shallow soup bowls, putting several spoonfuls of cooked rice in each bowl before ladling in the gumbo. A bottle of Louisiana hot sauce can be offered for diners who want their gumbo spicier.


,


Stuffed Dates, Sicilian Style


Dates stuffed with walnuts, pine nuts and honey go back to ancient Rome, as a sweet snack, and presumably as an appetizer.


Here’s a more modern version, in the southern Italian, particularly Sicilian, manner. Almonds are used instead of walnuts or pine nuts, and a soft cheese and a bit of grated orange zest are added to make the stuffed dates richer and creamier. The more common fresh cheese in Sicilian cooking is ricotta. But Mascarpone and goat cheese are also suitable. Goat cheese makes a more savory stuffing, so I would leave out honey. Mascarpone has the practical advantage over ricotta. It can be bought in small quantities, whereas ricotta comes in larger containers, requiring that the rest be used for something else if making stuffed dates for a small number of people.


Medjool dates are larger and creamier in texture than the Deglet Noor variety. For stuffing it’s best to get dates that still have their pits, which you remove just before stuffing. Two large Medjools, fully stuffed, make a substantial appetizer for a diner, especially if there are other appetizers offered.


This recipe makes enough filling to stuff 12 large Medjool dates, or more smaller dates. That should be enough appetizer for four to six people.


12 large Medjool dates, or 16-18 smaller dates, with pits

6 tablespoons roasted, salted whole almonds

4 ounces (1/2 cup) Mascarpone or ricotta cheese

1/2 teaspoon honey

1/4 teaspoon of grated zest from an orange (organic preferred)


Using a small, sharp knife, slit one side of each date from end to end, and carefully remove the pit. Gently spread open the cut dates to make room for the stuffing. 


On a cutting board, using a chef’s knife, chop the almonds fairly finely. Put 4 tablespoons of them into a small mixing bowl and set aside 2 tablespoons for finishing the dates.


Add the cheese, honey, and grated orange zest to the bowl containing the main portion of the chopped almonds. Mix these four ingredients together well. Smooth the surface of the stuffing mixture, then lightly mark the surface with the knife into half, then quarters. Then mark each quarter into three sections, for a total of 12 if using 12 dates, or into whatever number of dates used.


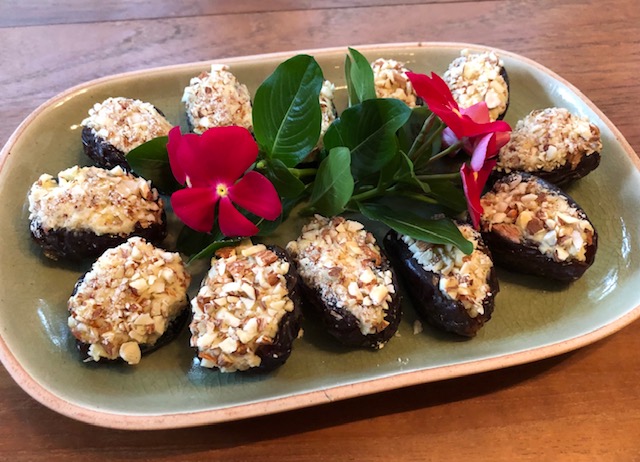
Using a small teaspoon to pick up a marked portion of the filling, carefully stuff the dates, smoothing the surface of the filling with the back of the spoon or your finger. Turn each stuffed date onto the reserved chopped almonds, and press them in very lightly.


Arrange the stuffed dates on a serving dish. They can be stored, refrigerated, lightly covered with plastic wrap. When serving, if desired, you can garnish the dish with some small flowers or decorative leaves.


,


Spice-Roasted Sweet Potatoes


Here’s a dish I’ve made frequently at our restaurant for catering. Herb and spice roasted sweet potatoes are a cheery side dish, or if served with a dipping sauce, such as rémoulade (check the index on this blog to find a very easy rémoulade recipe), it also makes a nice snack or appetizer buffet dish.


This seasoning mixture shows the method. Other seasonings, like a touch of curry powder, or Cajun mix, can be used instead. T
he dish can be made ahead and served later at room temperature, or the sweet potato cubes can be reheated in the oven and then served hot.


I don’t peel the sweet potatoes, for nutrition and convenience, but they can be peeled if you prefer.


The recipe serves six as a side dish, more as an appetizer.


2 medium-large sweet potatoes (about 2 to 2-1/4 pounds)

1 teaspoon salt

1/2 teaspoon Italian herb mix, Herbes de Provence, or dry oregano

1/4 teaspoon ground cumin

1/4 teaspoon paprika

1/4 teaspoon black pepper

1 pinch ground cinnamon

3 tablespoons olive oil


Set the oven for 350 degrees.


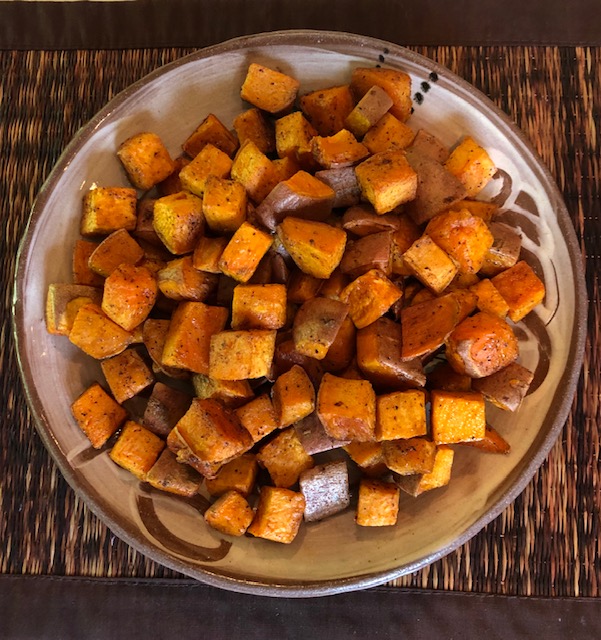
If not peeling the sweet potatoes, rinse them off well. Cut off tips and any blemished skin areas, and pull off any roots. Cut the potatoes in half lengthwise then into 3/4-inch wide lengthwise strips. Finally cut across to make 3/4-inch  cubes. Place these on  a baking sheet pan, such as a cookie pan.


Mix the salt and other dry seasonings. Sprinkle the mixture evenly over the sweet potato cubes. Then with your hands, toss them together and mix them well to distribute the seasonings. Add the oil, and again mix them well together to moisten them with the oil.


Roast in the heated oven for 10 minutes. Remove from the oven and slide a sharp metal spatula under them and turn and mix them.

Roast for another 10 minutes and again stir and toss them with the spatula. Roast for another 5-10 minutes. Test them for tenderness by sticking a toothpick into some. If needed, roast them a bit more, until they test tender.


Serve as a side dish, or make a dipping sauce, such as an easy rémoulade (see index in this blog for a recipe).

,


Thai Basil Chicken 


Thai chicken stir-fried with basil (“Gai Pad Bai Horapa”) is the sort of dish that is served along with several other savory dishes in a Thai dinner, which is inevitably based around rice, particularly Jasmine rice. The other dishes might include a curry, a vegetable stir-fry, a soup, a salad, and various condiments (but not fried or boiled noodles, which are for lunch or snack).  Collectively these dishes are referred to as “Gup Khao,” or “With Rice.”


My wife Christina, though American-born, grew up in Thailand in a mixed American and Thai environment. We were married in Bangkok, her home town. She is my authority on Thai cuisine and customs, as is my Thai sister-in-law, Nai, married to Christina’s oldest brother, and who is from Chiang Mai.


Basil Chicken is amazingly easy to make, aside possibly from finding Asian basil, Thai fish sauce (“Nam Pla”) and Chinese or Thai “Oyster Sauce.” Asian basil, sometimes called “Thai,” has light purple stems and flowers and is the same as the Vietnamese use in their cold basil rolls and their rice-noodle soup named “Pho.” (It’s easily grown in a home garden or pot.) All three ingredients are available at Asian stores where Southeast Asians shop. Italian basil can be substituted for Asian, but the flavor is somewhat different. Use many less of the large European basil leaves than the small Asian basil leaves, and cut them each into several pieces.


Here is my recipe, which makes enough to serve four to six people if there are other savory dishes, plus, of course, rice, which is the basis of most Asian meals. (Check the index in this blog for cooking jasmine rice, as well as that other great Asian rice, basmati). Because of the oyster sauce, which is typically made with wheat, this dish is not gluten-free unless a gluten-free oyster sauce is used. Fish sauce does not include wheat or any other source of gluten.


1 pound boneless, skinless chicken breast

1 1/2 teaspoons cornstarch

2 cloves garlic

1-2 hot Thai type chili peppers, or 1/4-1/2 teaspoon dried crushed pepper flakes

25 small Asian basil leaves (save about six of these for garnishing)

3 tablespoons oil such as peanut, sunflower or canola, not olive

1 tablespoon Thai fish sauce

2 teaspoons Chinese or Thai oyster sauce

6 tablespoons water


On a cutting board, trim fat and any tough parts off the chicken. Split the chicken flat-wise (“butterfly”), then cut each piece across into 1/8-inch shreds. Mix these thoroughly with the cornstarch. Place on a platter for the ingredients.


Peel and dice the garlic. Add to the platter in a different pile. Similarly finely chop the chilies (or use pepper flakes) and place them on the platter. Pick the basil leaves off the stems and put them on the platter. Reserve about six for garnish.


Heat a wok or heavy frying pan to medium high. Add the oil then the garlic, and stir and fry a few seconds as the garlic sizzles, but do not let it brown. Add the chicken, and stir quickly, scraping the bottom of the pan, until the chicken has lost most of its raw color.


Stir in the hot peppers and the oyster and fish sauces. Stir and fry briefly then add the water. Stir and scrape the bottom of the pan, ten or fifteen seconds, or until there is no raw color in the chicken and a sauce has thickened. Turn off the heat and stir in the  basil leaves other than those reserved for garnish. Stir ten seconds. Taste the sauce and if it needs a little salt add some.


Spoon carefully onto an oval platter. Place the reserved basil and push it into the hot dish a little to soften.


Serve with unsalted jasmine rice, preferably with other Thai di
shes.


,


Quick Pear Chutney, a Great Appetizer Topping for Brie Cheese


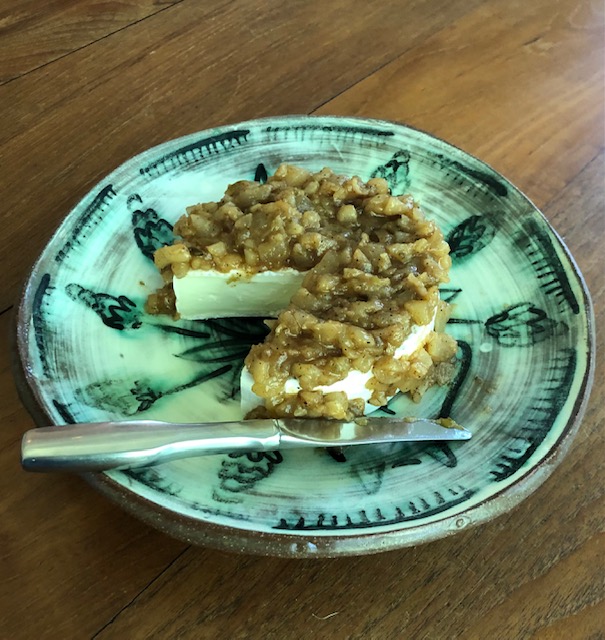
As autumn approaches, fresh pears are readily available. Here’s an easy and economical pear chutney that makes a delightful topping for Brie cheese or Mexican-style Queso Fresco (“fresh cheese”) for an appetizer. The chutney also goes well over goat cheese. Alternatively, it can be spread lightly as a condiment on meat or cheese sandwiches. Despite going well with cheese or meats, the chutney itself is completely plant-based.


“Chutney” comes from the Hindi word “chatni,” which in turns derives from a Hindi verb meaning “to eat with appetite.” Savory condiments have been part of the cuisines of the Indian Subcontinent for over two millennia. Chutneys, especially those made of spiced fruits, along with their name, came to Great Britain from India early in the colonial period.     


The recipe makes about one cup, enough for topping two 8-ounce round cheeses for appetizer use. The chutney will keep in the refrigerator for several weeks.


2 large or 3 medium pears, such as Bosc, Anjou or Bartlett

1 green onion, white and green parts, or a small piece of regular onion

4 teaspoons cider vinegar

1 tablespoon brown sugar

1/2 teaspoon vegetable oil

1/2 teaspoon salt

3/8 teaspoon paprika

1/8 teaspoon ground cinnamon

1/8 teaspoon ground black pepper

1 large pinch dry ground ginger, or 1/4 teaspoon grated fresh ginger

1 large pinch ground cloves

1 small pinch cayenne


Peel pears. On a cutting board, cut them lengthwise into quarters. Cut out their cores and seeds. Coarsely chop the pear flesh and place it in a small enamel or stainless steel (not aluminum or cast iron) pot. On the cutting board, cut off the roots and any dried tip ends of the green onion (or use a bit cut off from a regular onion). Chop the onion very finely. Add this to the pears, along with all the remaining ingredients.


Turn on heat to medium low, stir the ingredients, and cover the pot. Simmer the mixture, covered, in its own juices, stirring every minute or two, until pear is fairly tender, 10-15 minutes. Remove from the heat. Taste, to check the seasonings. Add a little salt, sugar, and/or vinegar, if necessary, to reach the desired taste.


Let the chutney rest at least several hours before use so that the flavors mingle. It can be served now or can be stored in a covered jar for several weeks in the refrigerator. 


Pear chutney compliments a variety of soft cheeses on the buffet or appetizer table, accompanied by low-salt crackers, like “water crackers,” or Melba toast. Let the cheese round or wedge come to room temperature before topping with chutney.

Follow Us @donderoskitchen